
Deploying a ReactJS Web Application to AWS Elastic Beanstalk with Azure DevOps Pipeline
By Balaji Ramulapalli / Mar 15,2023
This post demonstrates how to create a simple Azure DevOps project, repository, and pipeline to deploy an ReactJS Web application to AWS Elastic Beanstalk using Azure DevOps.
Table of Contents
- High level architecture
- Pre-requisites
- Azure DevOps Continuous Integration (CI) process
- AWS deployment creation
- Azure DevOps Continuous Deployment (CD) process
- Cleanup
- Learning Reference
- Conclusion
The following screenshot shows a high-level architecture diagram of the pipeline:
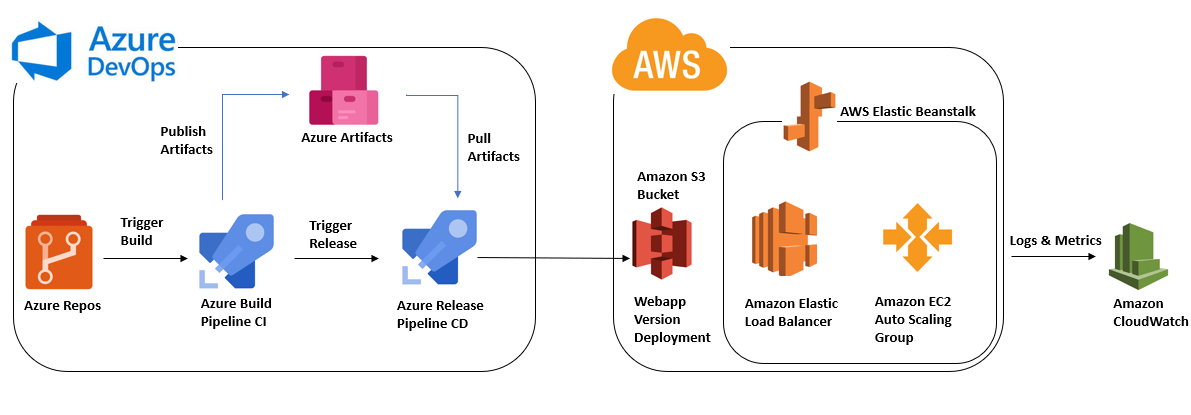
In this post, we are going to deploy ReactJS Application using Azure DevOps and AWS Elastic Beanstalk.
Pre-requisites:
- Sign in as an IAM user in AWS Account : Open the AWS Management Console at https://console.aws.amazon.com/ Alternatively, open a browser and enter the following sign-in URL, replacing account_alias_or_id with the account alias or 12-digit account ID provided by your administrator: https://account_alias_or_id.signin.aws.amazon.com/console/
- AWS account (Administrator Access follow least privilege principal and create specific permissions) AWS account to create the resources like AWS IAM, Amazon S3, AWS Elastic Beanstalk, Amazon CloudWatch and Amazon EC2.
- AWS service role is required to create the above AWS services : A service role is an IAM role that a service assumes to perform actions on your behalf. An IAM administrator can create, modify, and delete a service role from within IAM. For more information, see Creating a role to delegate permissions to an AWS service in the IAM User Guide.
- Sign up with a personal Microsoft account : Select the sign-up link for Azure DevOps. Sign in to your organization at any time, (https://dev.azure.com/{yourorganization}).
- Azure DevOps account for creating the resources like Azure DevOps Service connection, Azure Build pipeline, Azure Release Pipeline and Azure Repo.
- Contributors permissions is required for devOps engineer to build the CICD Pipeline.
- Please refer below links for type of permissions and how to add the users and assign permissions to the users in azure devops portal. https://learn.microsoft.com/en-us/azure/devops/organizations/security/about-permissions?view=azure-devops&tabs=preview-page https://learn.microsoft.com/en-us/azure/devops/pipelines/policies/set-permissions?view=azure-devops
Azure DevOps Continuous Integration (CI) process:
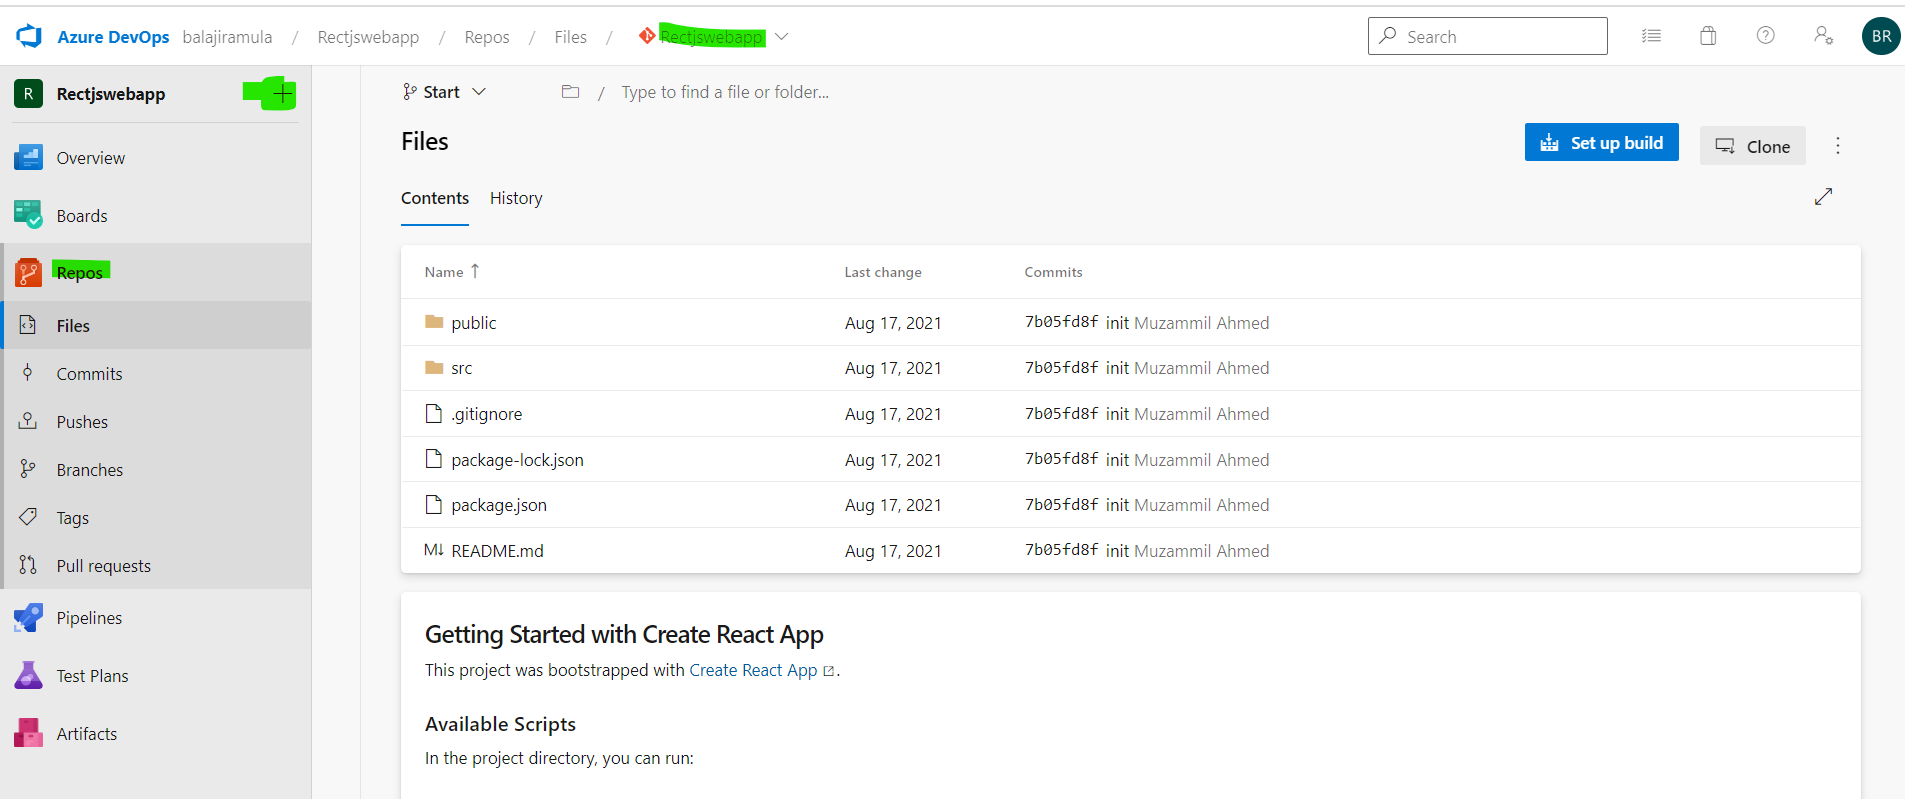
Azure Repo Creation:
- Create the Azure repo as below mentioned steps.
- Create an Azure DevOps Project, clone project repo, and push ReactJS web application.
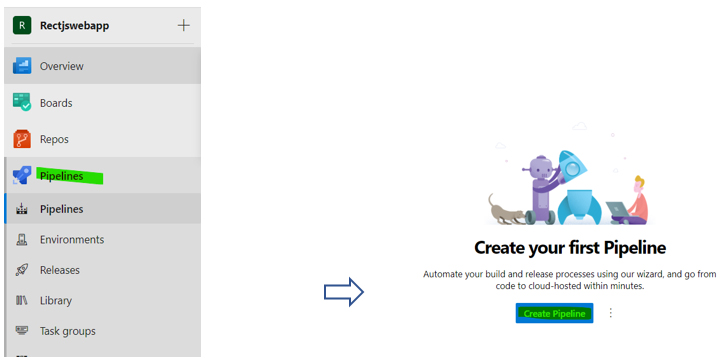
- Build Pipeline (CI)
- Click the pipeline and click the create pipeline button.
- Select the Azure Repos git option and select the already created repository.
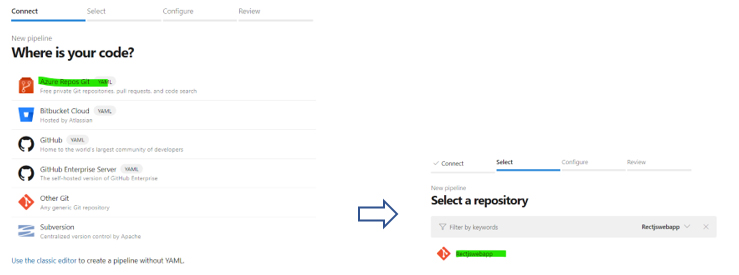
- Select NodeJS with React then the Auto-generated YAML Code showed up. for now, I just save and run this.
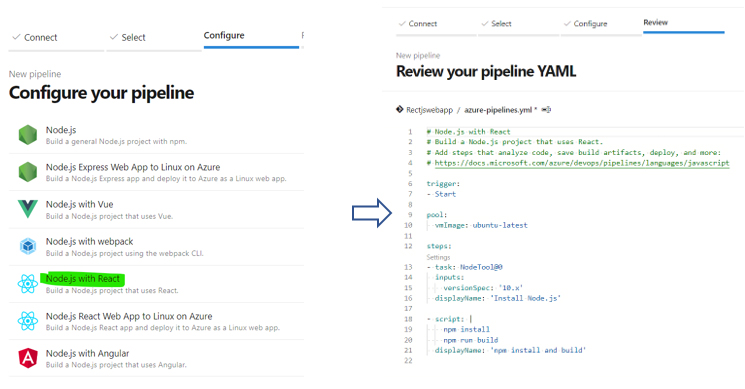
- Update the default yaml file with below code to generate the artifact.
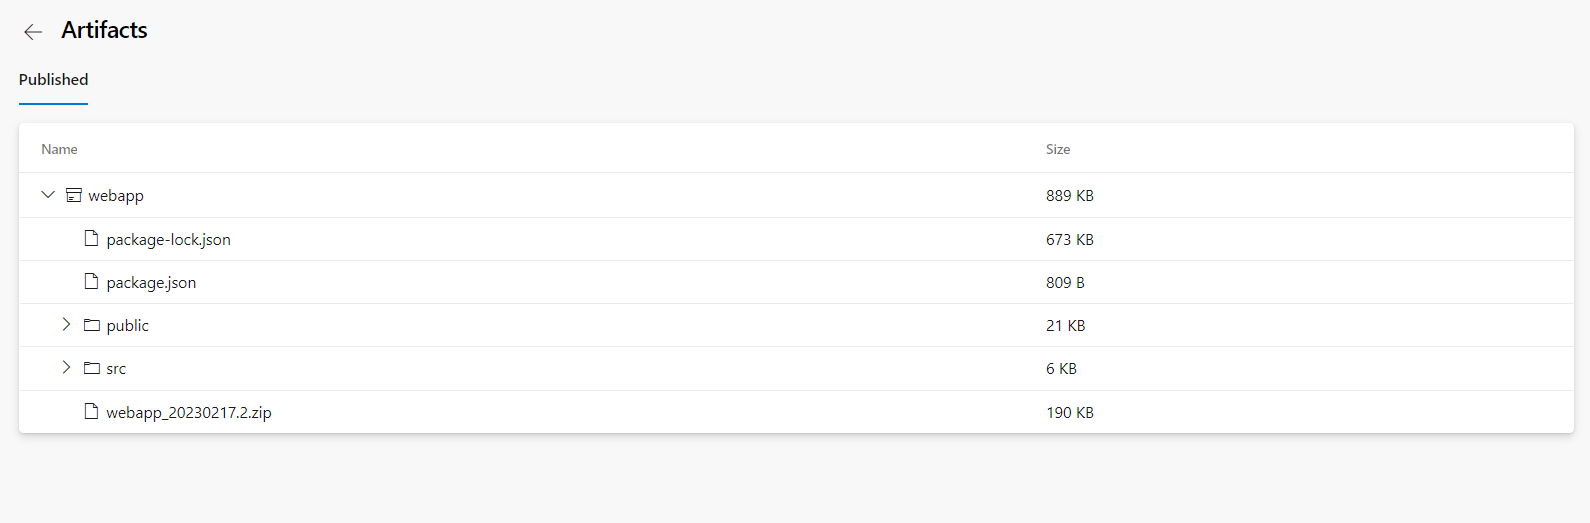
- Save the build pipeline, build pipeline will be triggered automatically.

- Click the published tab to see the artifacts.
AWS deployment creation
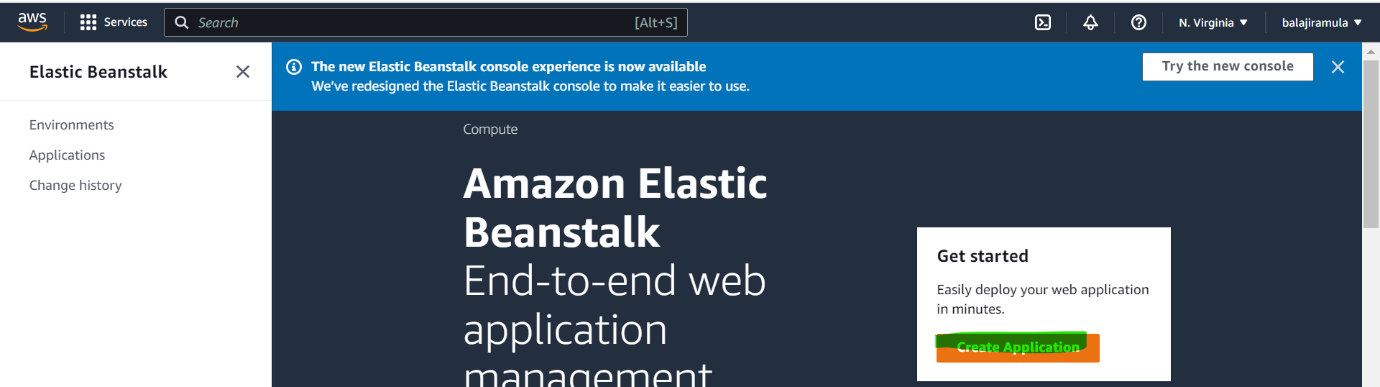
- Configure Deployment Environment in AWS Elastic Beanstalk
- Login into the AWS console and search for AWS Elastic Beanstalk in services. Click the create application button to trigger the environment.
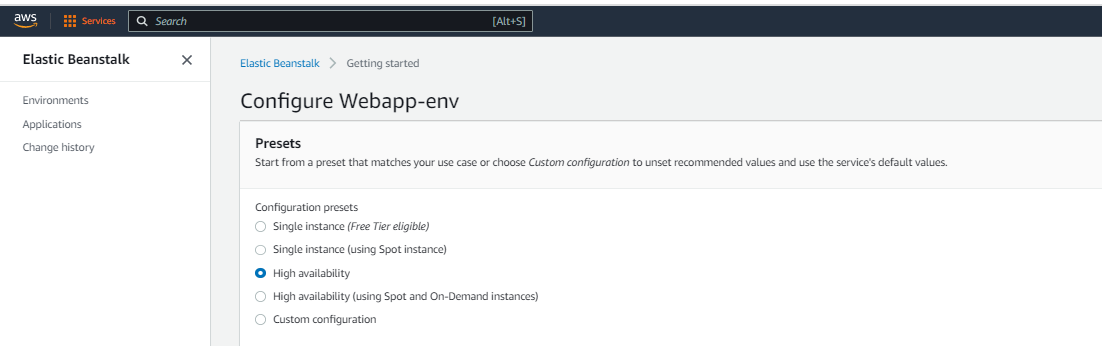
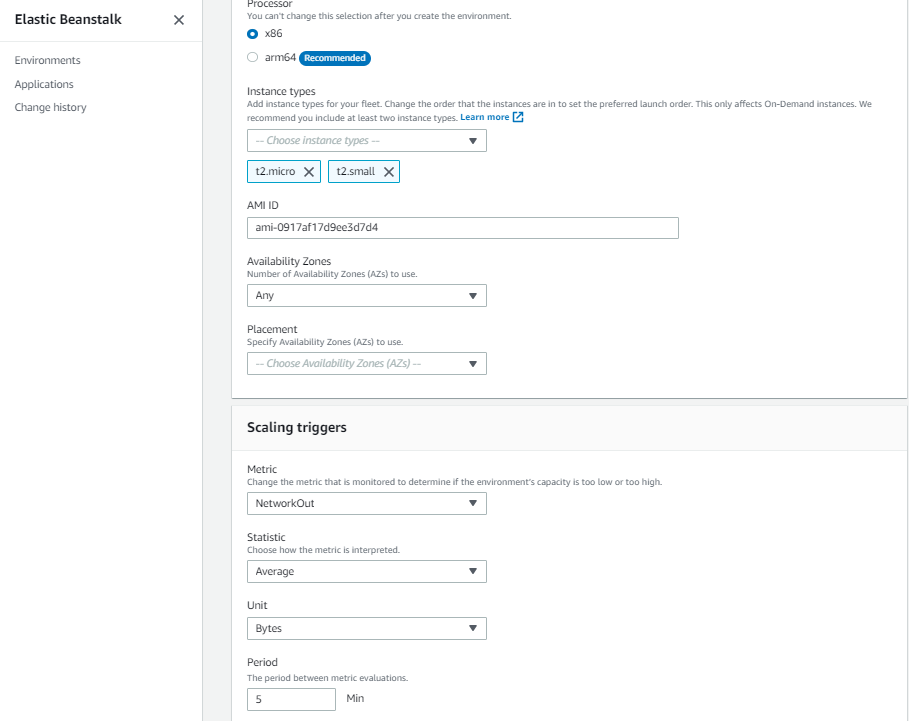
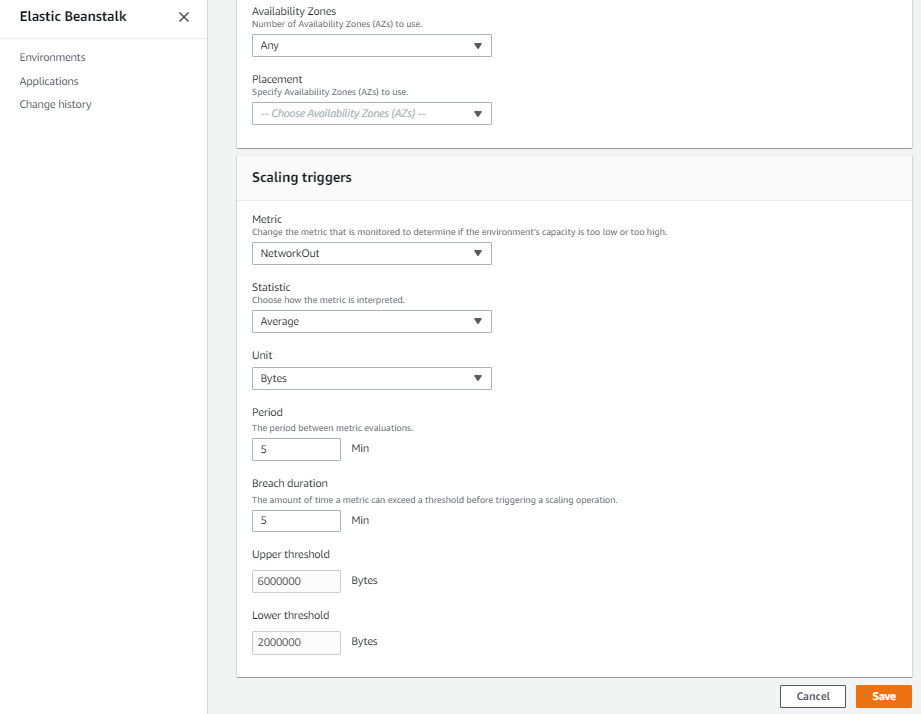
- Update the environmental configurations as below mention.
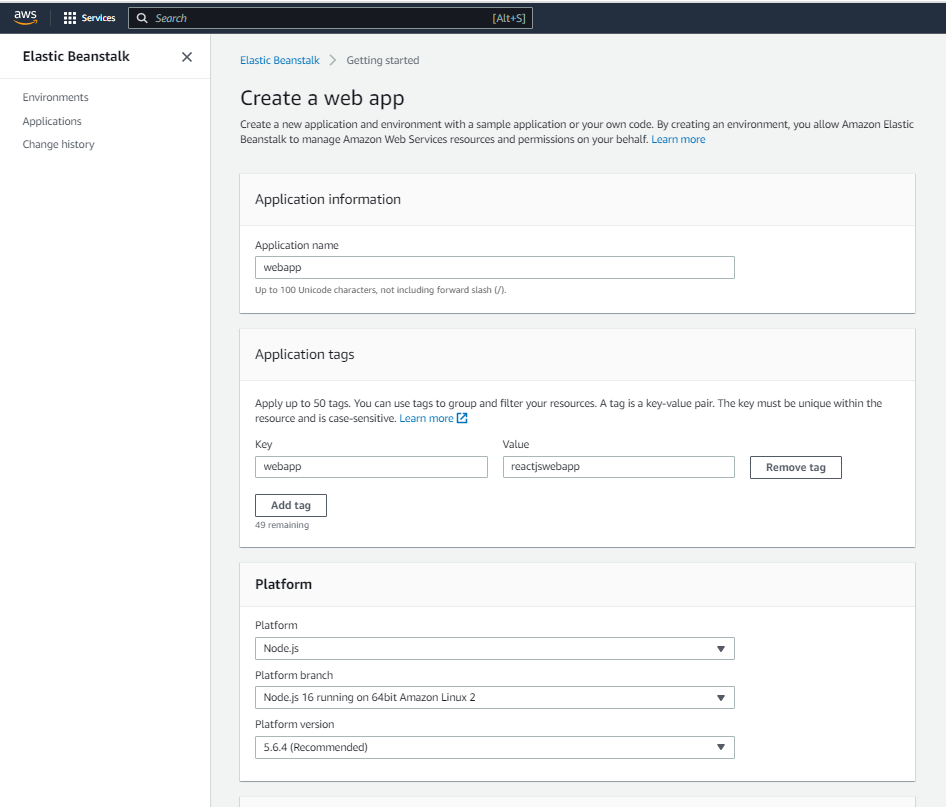
- Select the application type.
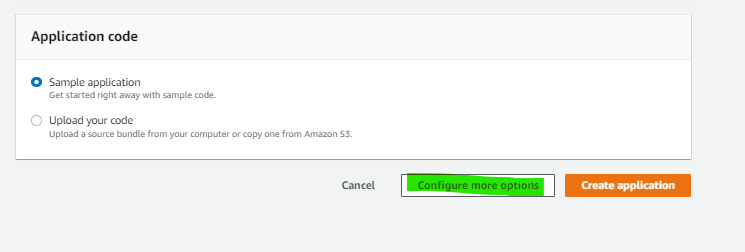


- Click the save button to create the environment.
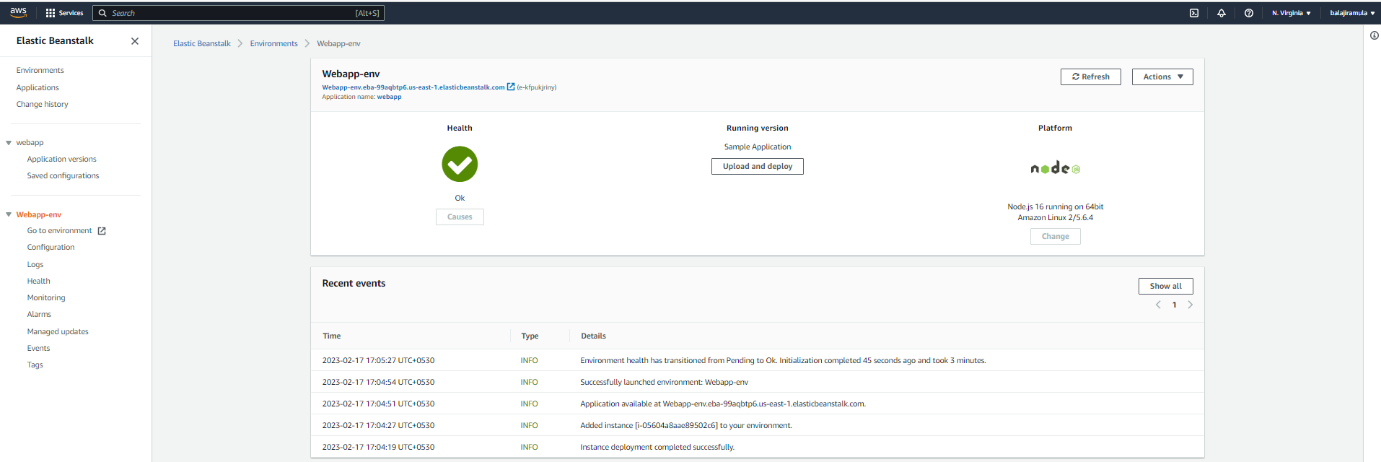
- Environment created successfully.
Azure DevOps Continuous Deployment (CD) process
- Establish connection between Aws Elastic Beanstalk to Azure DevOps
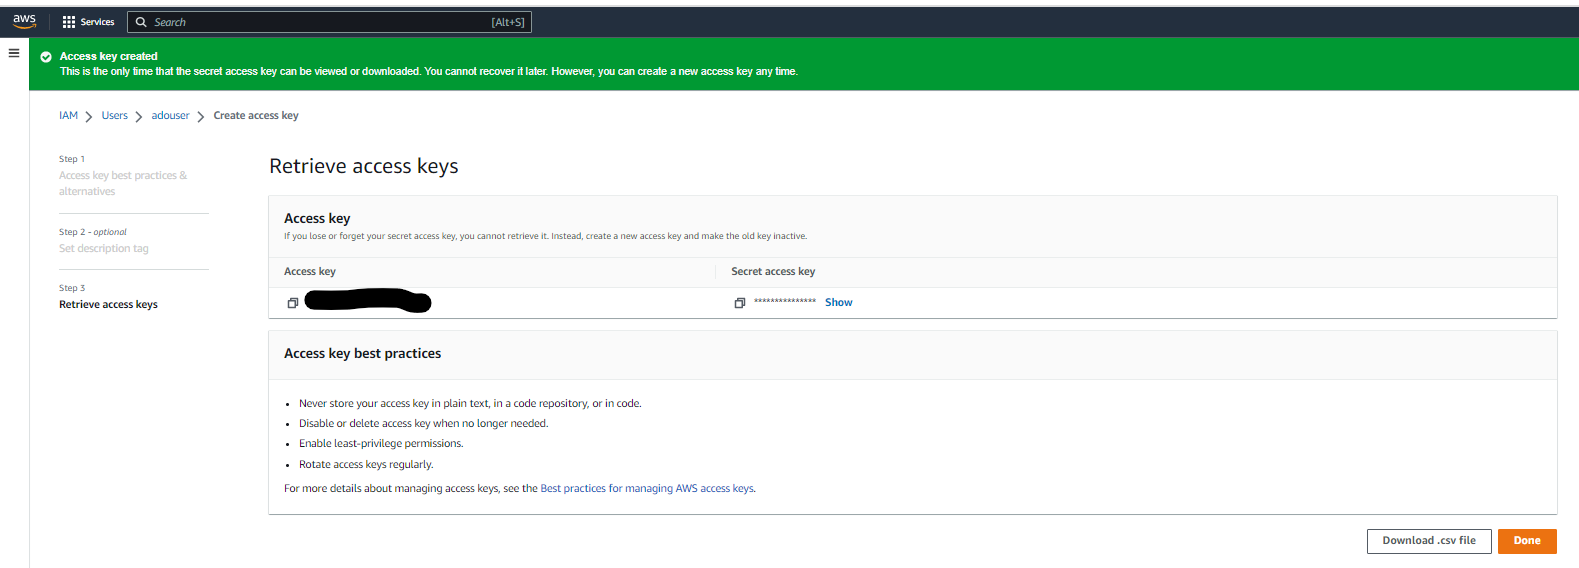
- Create the IAM user and grant the required access (Amazon S3 bucket access) AWS services > select IAM > users > adduser > create access key
- Create service connection in Azure Devops portal.
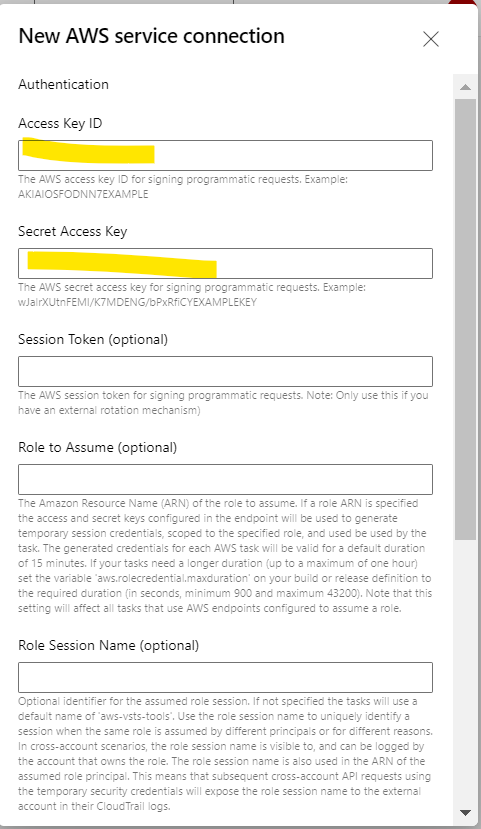
- Login Azure Devops portal > Project Settings > Service connections > click the “New service connection” > select “AWS”
- Then add AccessKey ID & Secret Access Key which is defined above
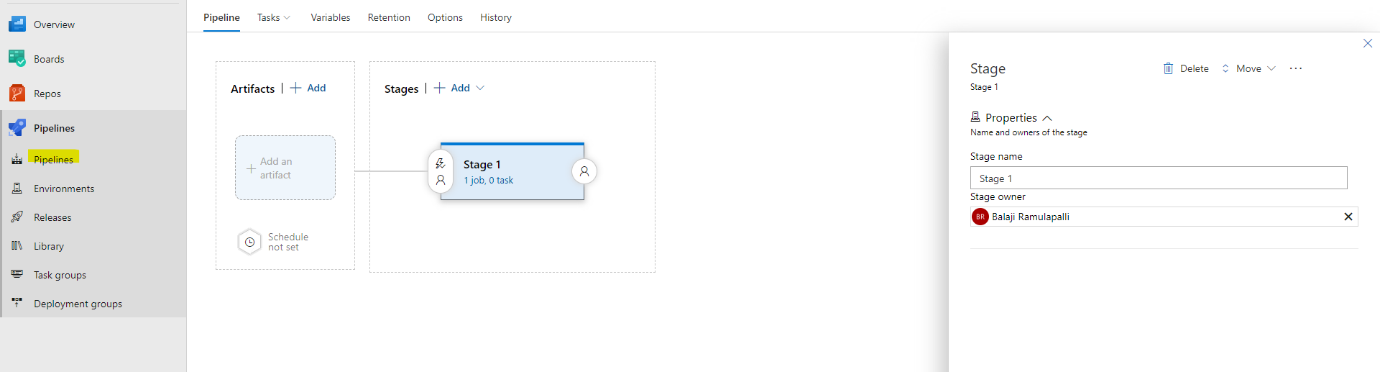
- Create Release Pipeline (CD)
- Select the releases under pipelines.
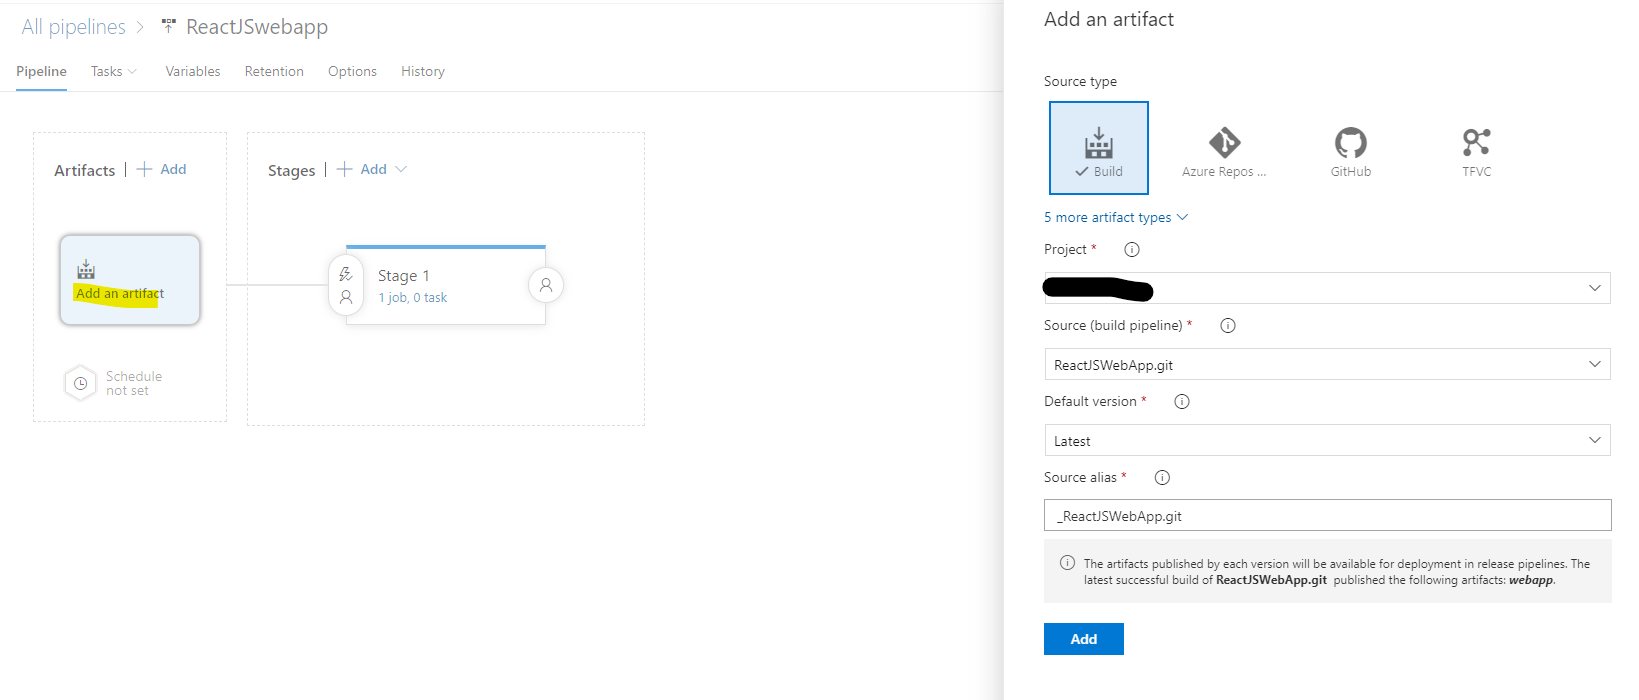
- Add the artifact as below mentioned.
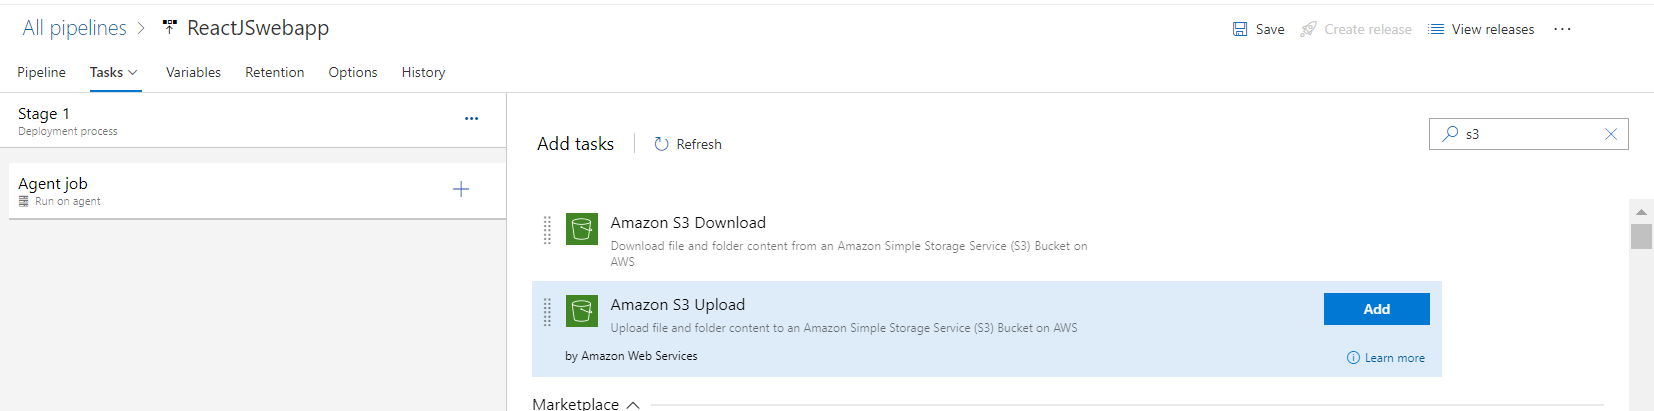
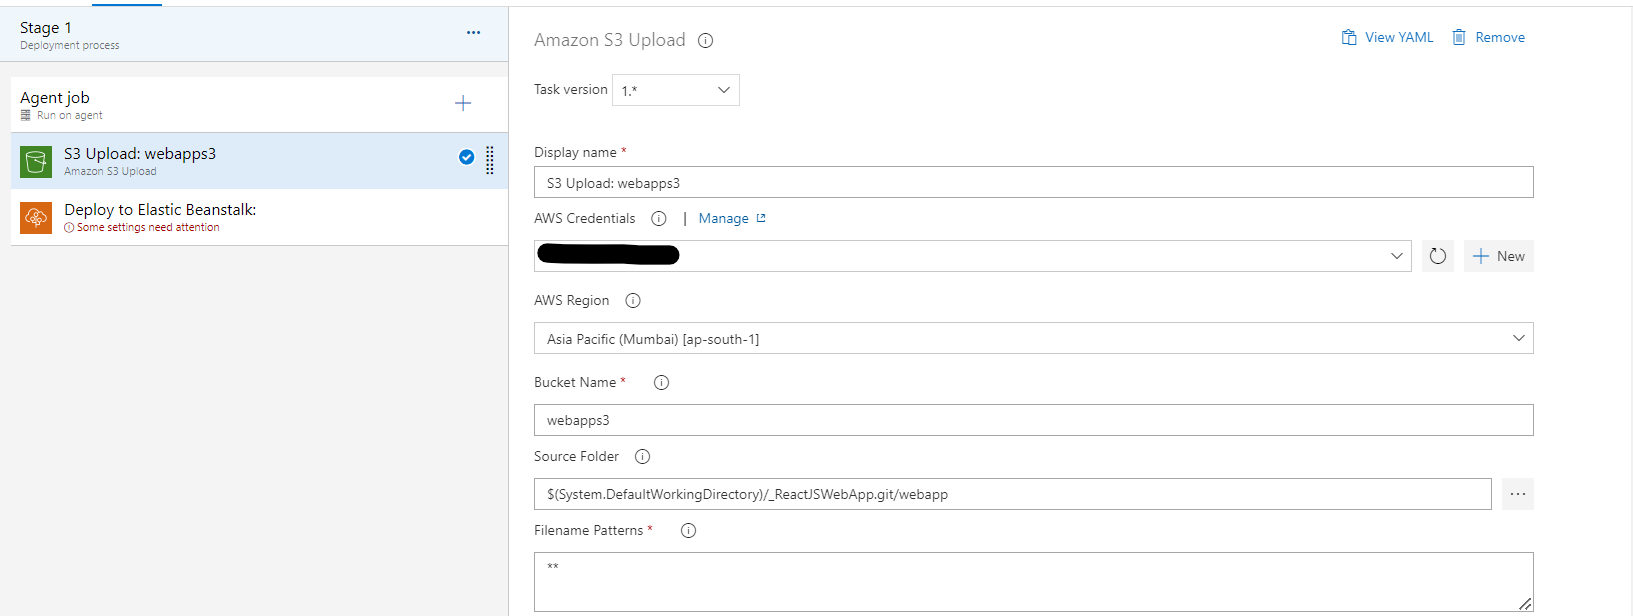
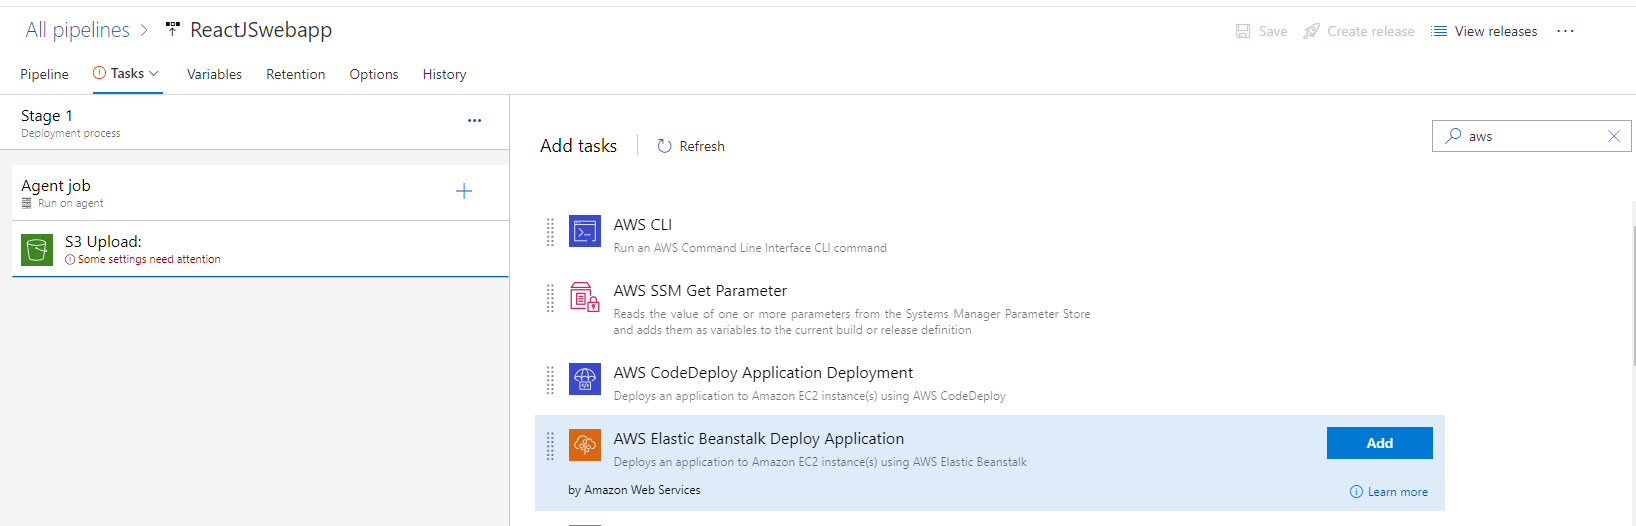
- Add amazon s3 upload task for uploading the artifacts into s3 bucket.
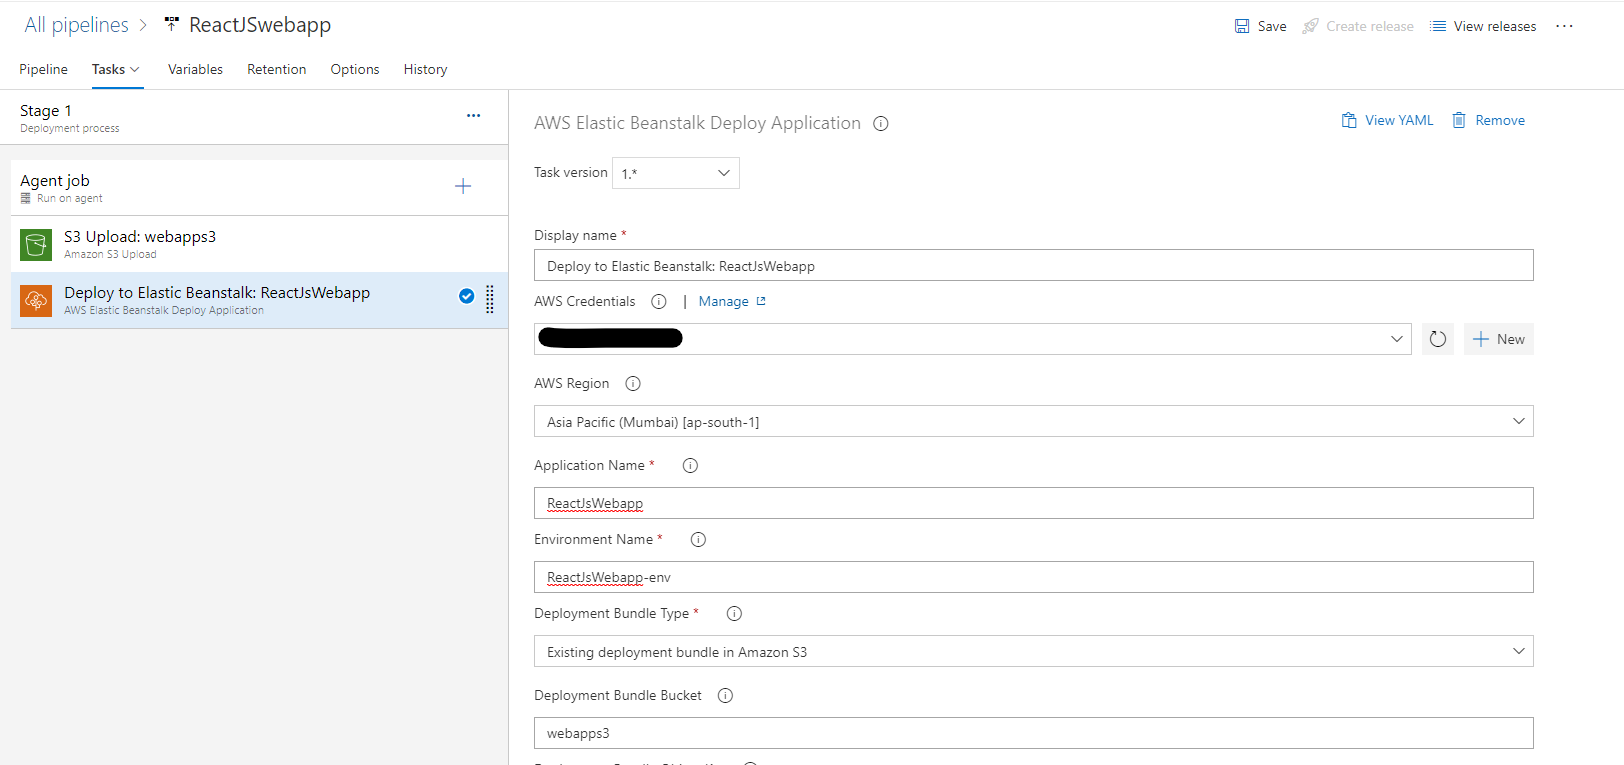
- Add AWS Elastic Beanstalk app deploy task for deploying the webapp in Elastic Beanstalk.
- Save and create release to trigger the release pipeline.
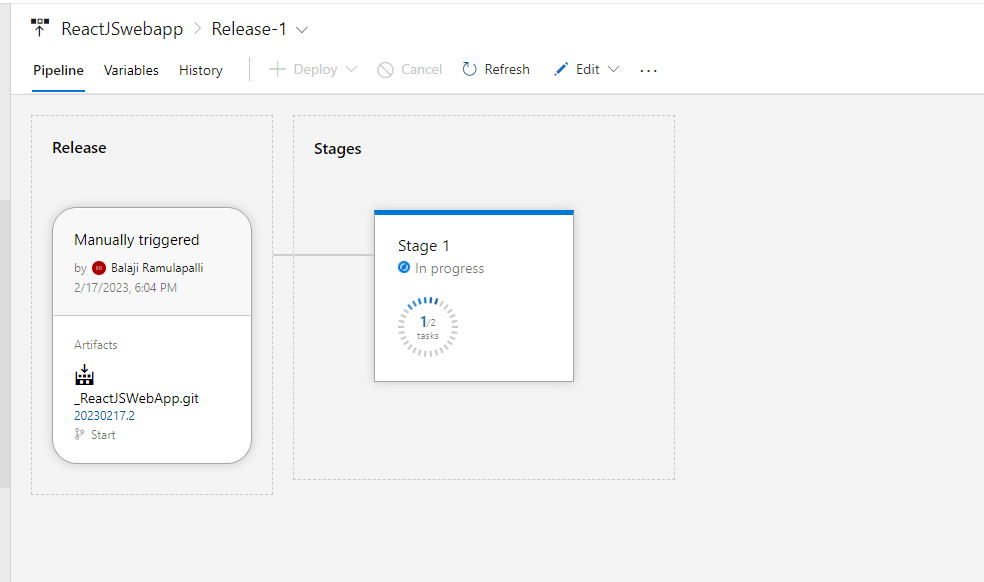
- Release pipeline deploying the web application in Elastic Beanstalk.
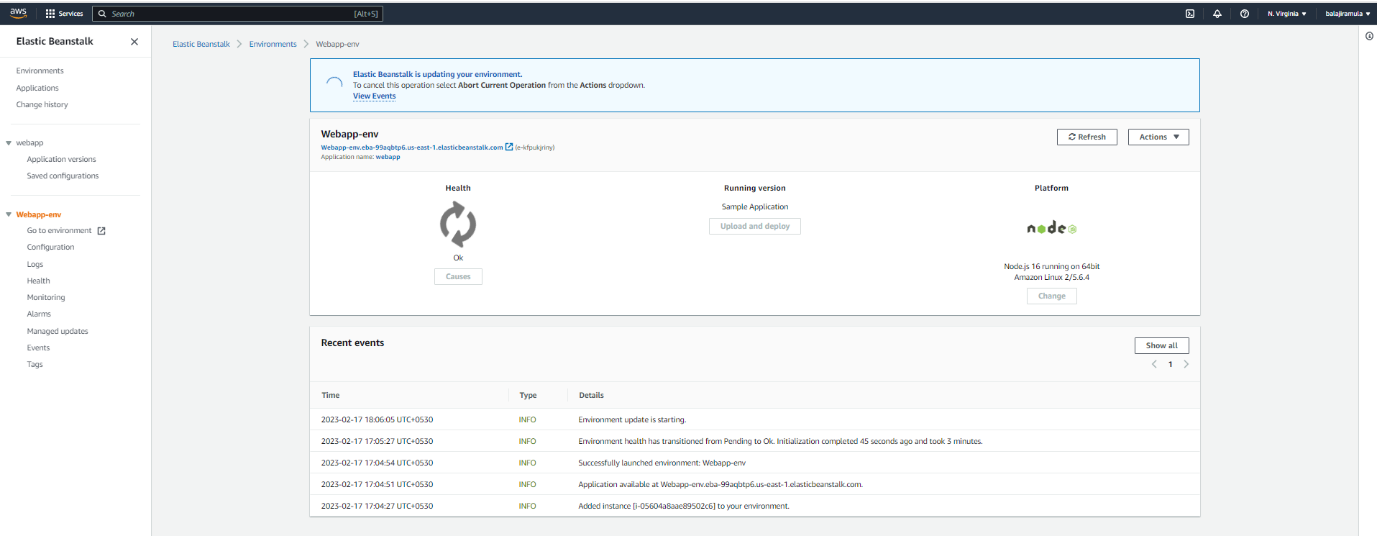
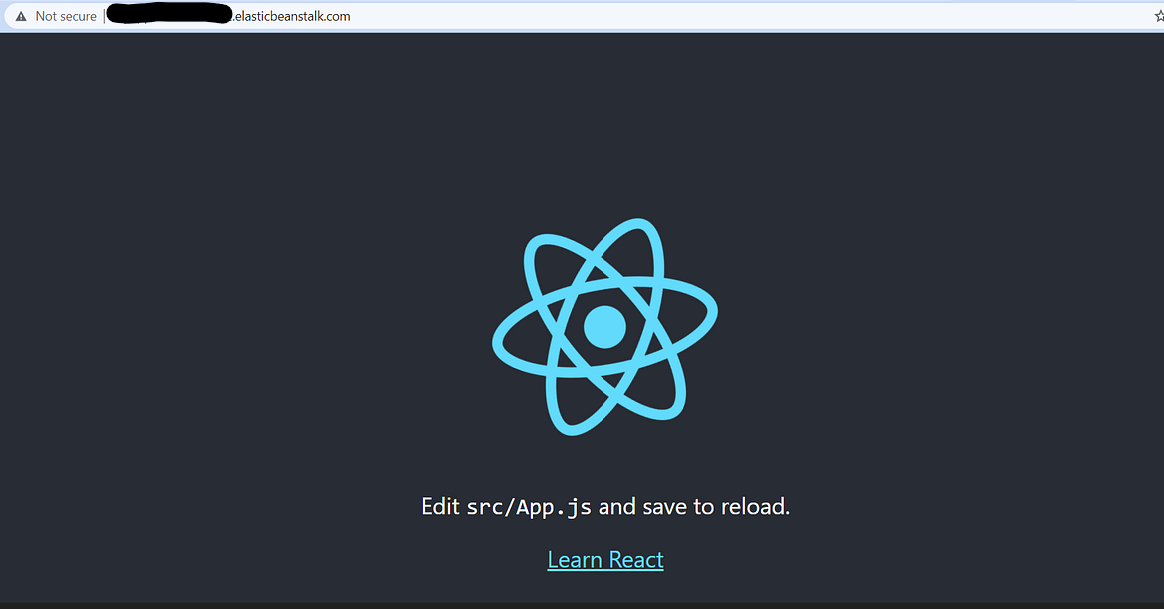
- Web application deployed successfully in AWS Elastic Beanstalk.
Cleanup
Delete Azure Repo:
- Log in to Azure DevOps and open your project.
- Select Repos, Files.
- From the repo drop-down, select Manage repositories.
- Select the name of the repository from the Repositories list, choose the ... menu, and then choose Delete repository.
- Confirm the deletion of the repository by typing the repo's name and selecting Delete.
Delete Azure Build Pipeline:
- Log in to Azure DevOps and open your project.
- On the left side menu under Pipelines, click on Pipeline.
- Click on More Options against the Azure DevOps Pipeline you want to delete.
- Click on Delete. Provide the name of the pipeline to confirm it and then click on Delete.
Delete Azure Release Pipeline:
- Log in to Azure DevOps and open your project.
- On the left side menu under Pipelines, click on Releases.
- Click on More Options against the Azure DevOps Releases you want to delete. Click on Delete.
- Provide the name of the pipeline to confirm it and then click on Delete.
Delete AWS Deployment Environment ( Elastic Beanstalk):
- Delete all application versions.
- Open the Elastic Beanstalk console, and in the Regionslist, select your AWS Region.
- In the navigation pane, choose Applications, and then choose getting-started-app.
- In the navigation pane, find your application's name and choose Application versions.
- On the Application versions page, select all application versions that you want to delete.
- Choose Actions, and then choose Delete.
- Turn on Delete versions from Amazon S3.
- Choose Delete, and then choose Done.
- Terminate the environment.
- In the navigation pane, choose getting-started-app, and then choose GettingStartedApp-env in the environment list.
- Choose Actions, and then choose Terminate Environment.
Confirm that you want to terminate GettingStartedApp-env by typing the environment name, and then choose Terminate. - Delete the getting-started-app application.
- In the navigation pane, choose the getting-started-app.
- Choose Actions, and then choose Delete application.
- Confirm that you want to delete getting-started-app by typing the application name, and then choose Delete.
Learning Reference
- https://docs.aws.amazon.com/elasticbeanstalk/latest/dg/GettingStarted.html
- https://www.azuredevopslabs.com/labs/vstsextend/azuredevopsprojectdotnet/
Conclusion
Azure DevOps is the right solution if you want to build Easy CI/CD pipeline, it is easy to configure and easy to integrate with any other cloud service just we integrate with AWS.
Elastic Beanstalk is the right solution if you want to deploy web apps quickly without worrying about any underlying infrastructure.
