
Deploy New Relic Infrastructure Agents on multiple EC2 instances at once using AWS Systems Manager
By Janvi Thakkar / Feb 20, 2024
Table of Content:
Introduction:
Amazon Web Services (AWS) provides various tools and services designed to streamline the management of cloud infrastructure. Among these, AWS Systems Manager is one of the robust solutions, empowering users to efficiently manage their EC2 instances on a large scale. With the AWS Systems Manager Distributor, you can distribute and automatically deploy New Relic Infra Agent on your Linux EC2 instances. But New Relic’s third-party distributor package asks for providing API keys as parameter, which can be later revealed by analysing the logs.
As this poses serious security threat, we will be creating our own distributor document which can be used to install multiple Linux or windows EC2 instances in one go with the help of AWS System Manager Run Command. Before we jump onto step-by-step guide, let’s look at assumptions taken into consideration and pre-requisites.
Assumptions and pre-requisites:
- You require to install scripts on multiple EC2 instances, and the outbound internet connection is there in EC2 instances through NAT gateway in case of private instances.
- SSM Agent is installed on each EC2 instance, and all the instances are registered under Fleet Manager. We assume that all the necessary steps have already been performed to bring EC2 instances under Systems Manager.
- Before installing infrastructure agent, make sure your system and any on-host integrations you configure meet the requirements. Please check supported operating systems from here.
Step-by-step Guide:
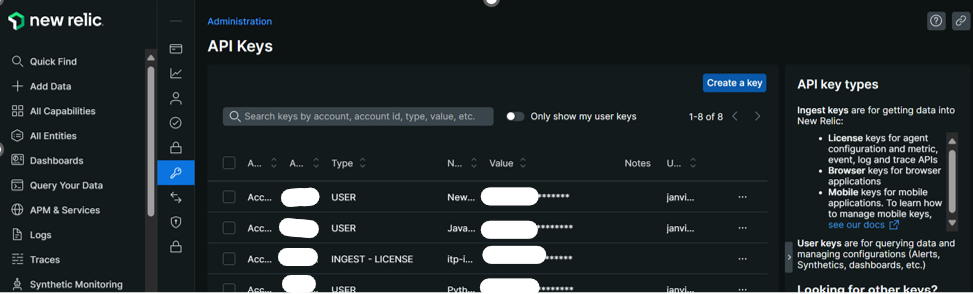
- We first need to create the API Key, for that purpose go to New Relic Dashboard> User > API Keys.
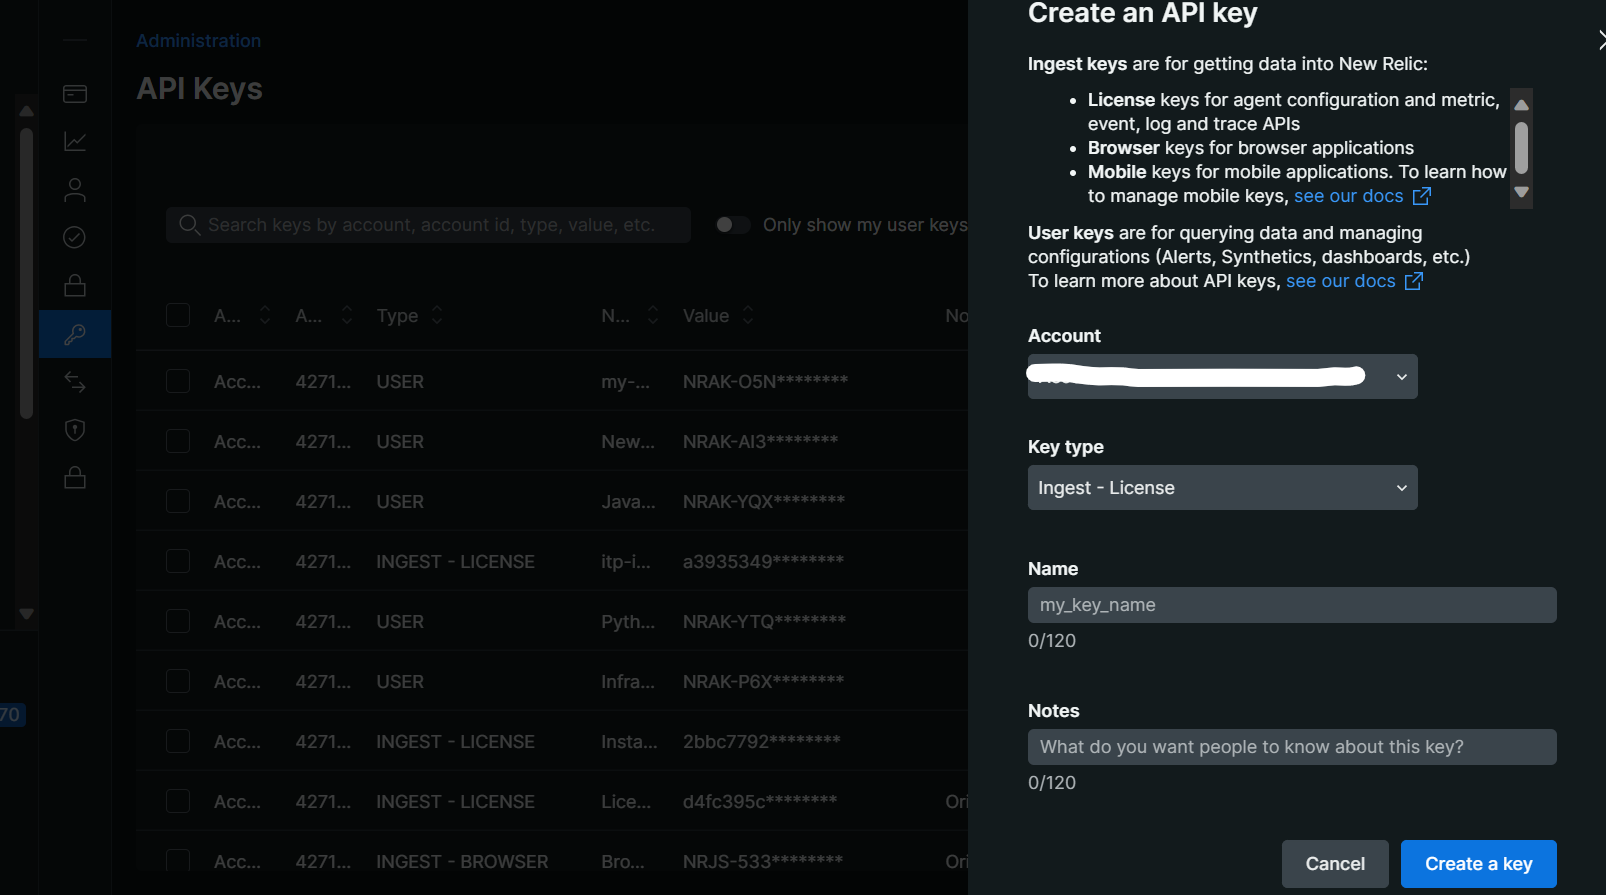
- Click on Create a key button.
- Enter the necessary details. Make sure to select the key Type as a Ingest-License and click on Create a key button.
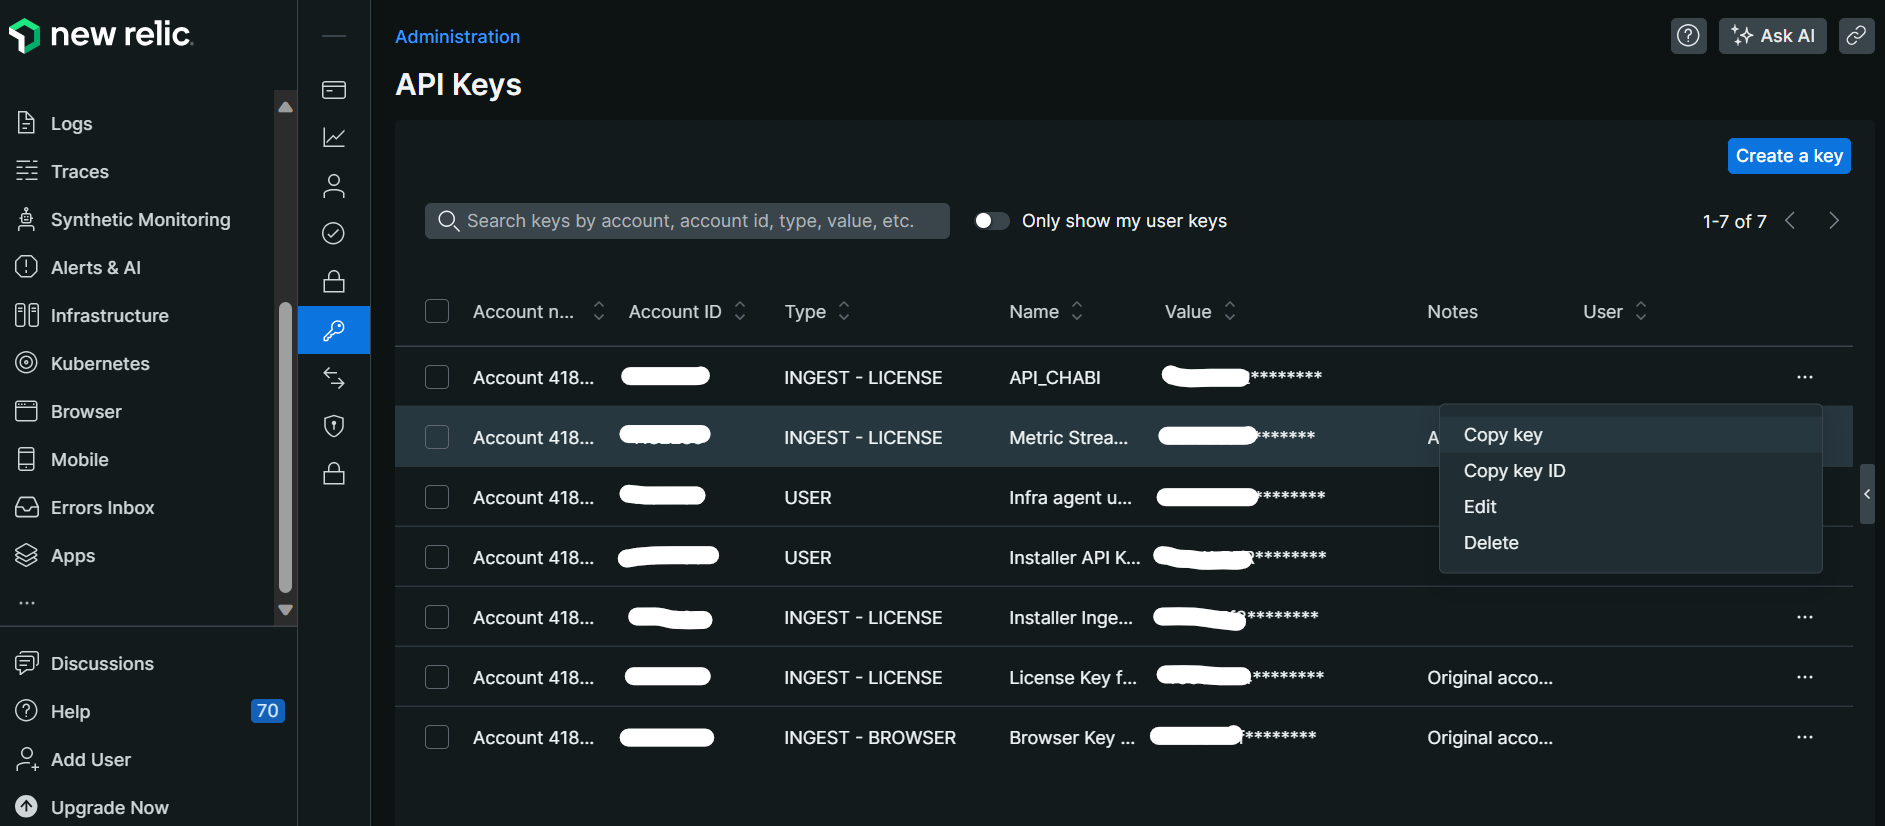
- To use the newly created key, go to API Keys dashboard and select the three dots given beside the API Key which you have just created. Select the Copy Key option.
- Open AWS Systems Manager from AWS console.
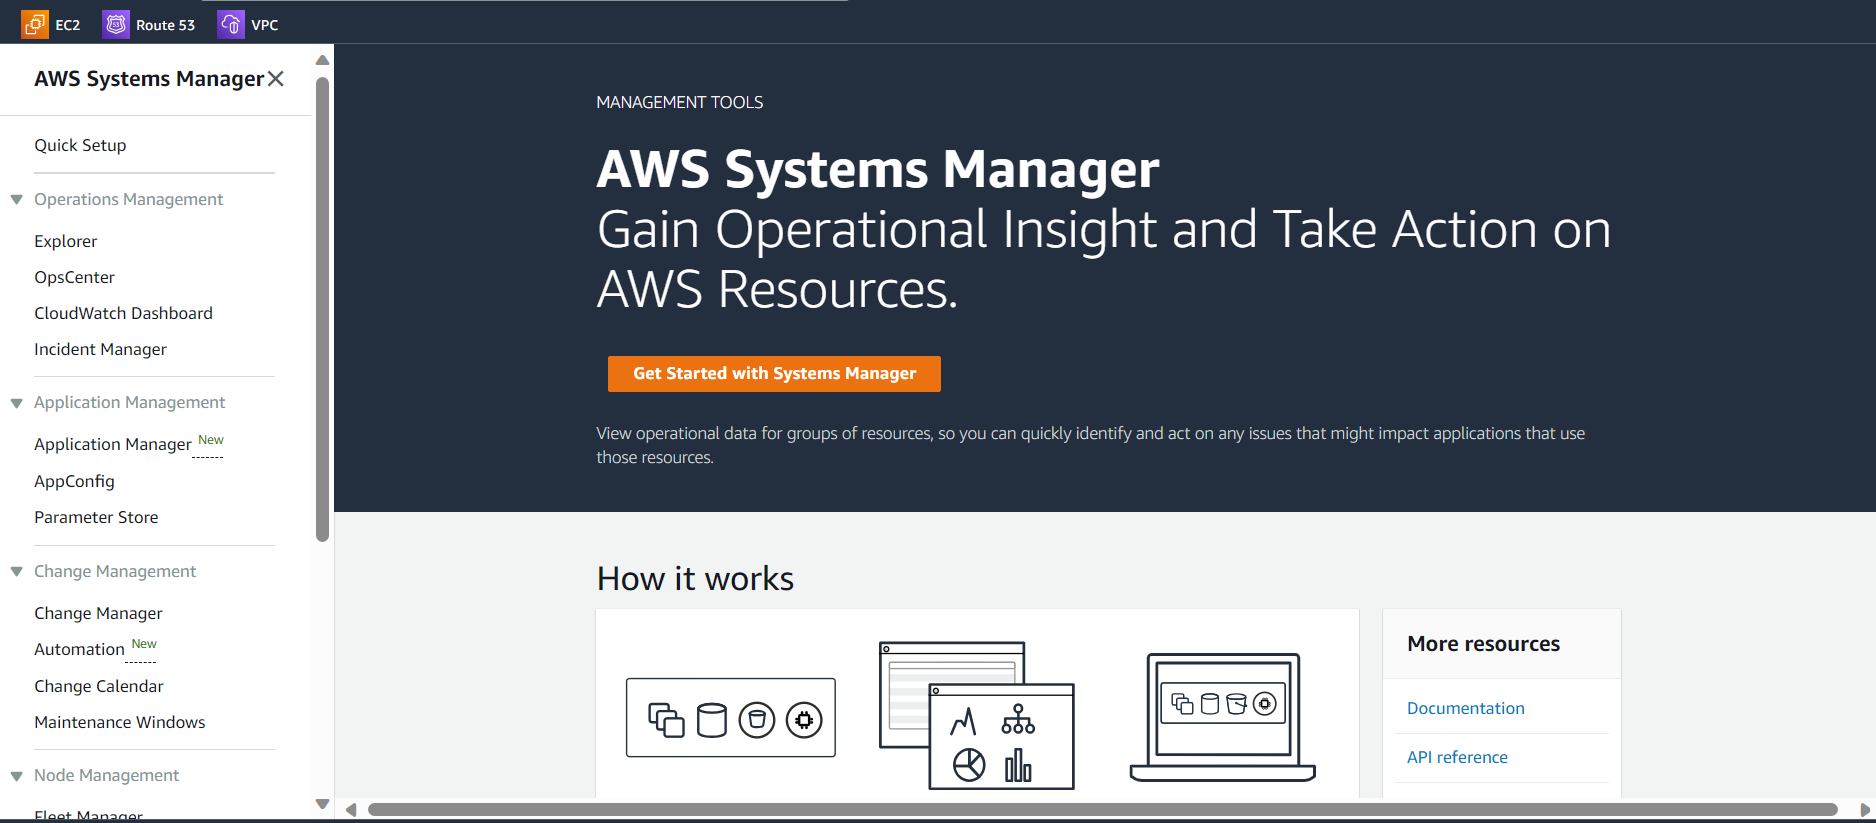
- Click on Parameter Store from the sidebar menu.

- Click on Create parameter button.
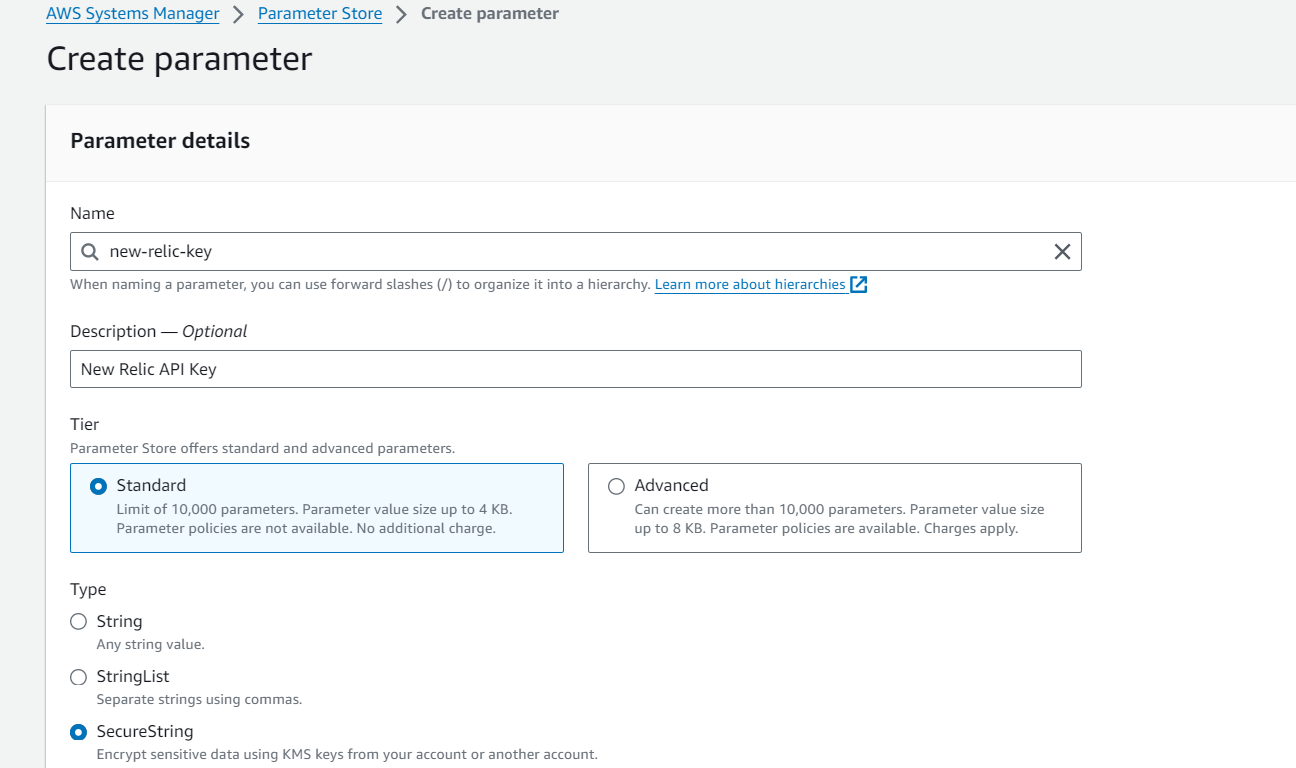
- Make sure to add necessary details and select SecureString as a Type for the parameter.
- Select the KMS key ID, you would like to use for Encryption and Decryption. In case you want to use a customer managed private KMS key, please create a key first using KMS and then select the key here.
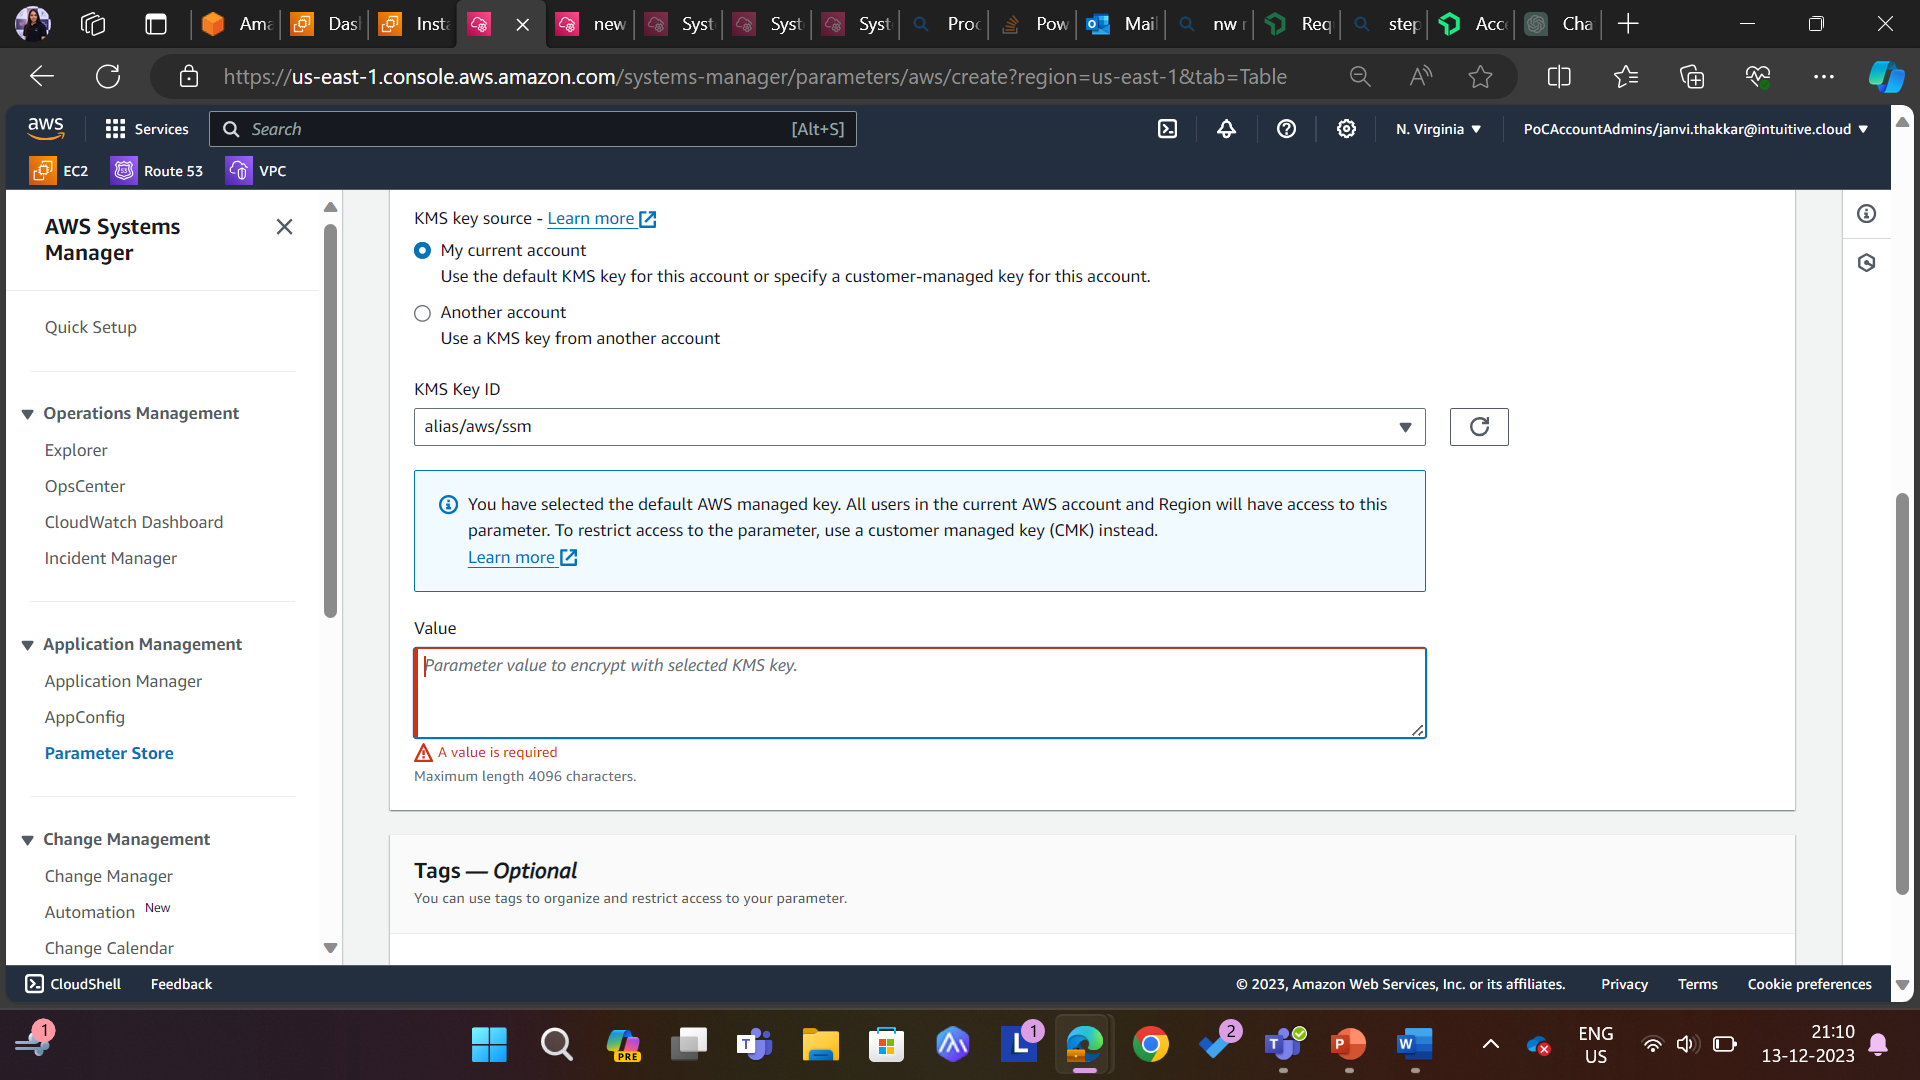
- In the Value parameter, provide the API Key created in the earlier step.
- Once done, click on Create parameter button.
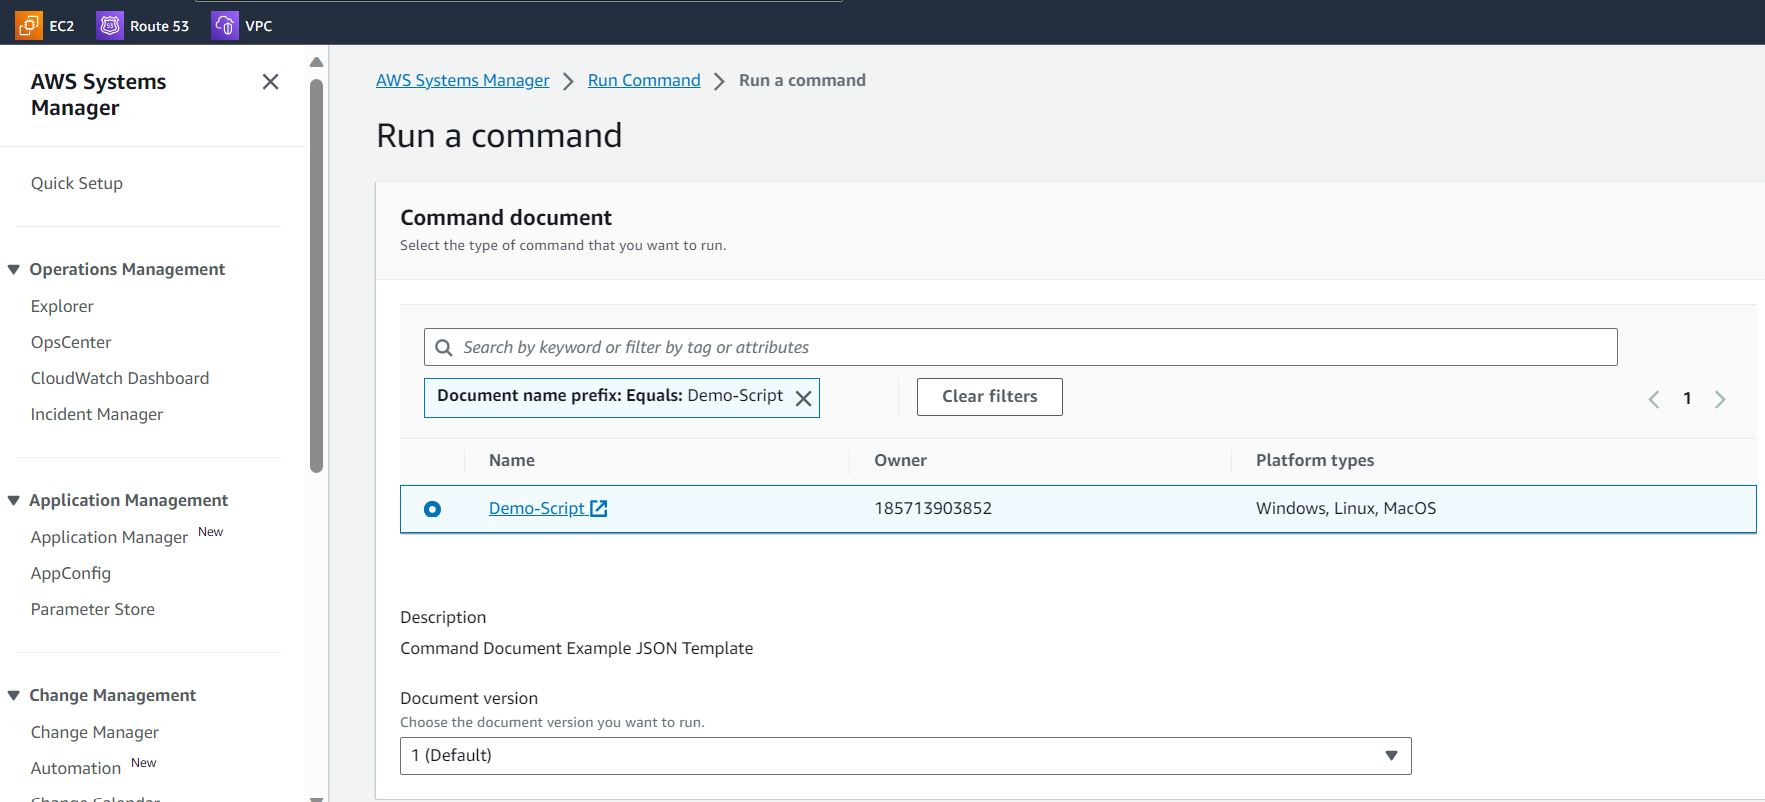
- From the Side Navigation Bar, head over to Shared Resources > Document.
- Create the Command Document.
- Click on Create document button and create the document. Here you need to select Command or Session from the dropdown.
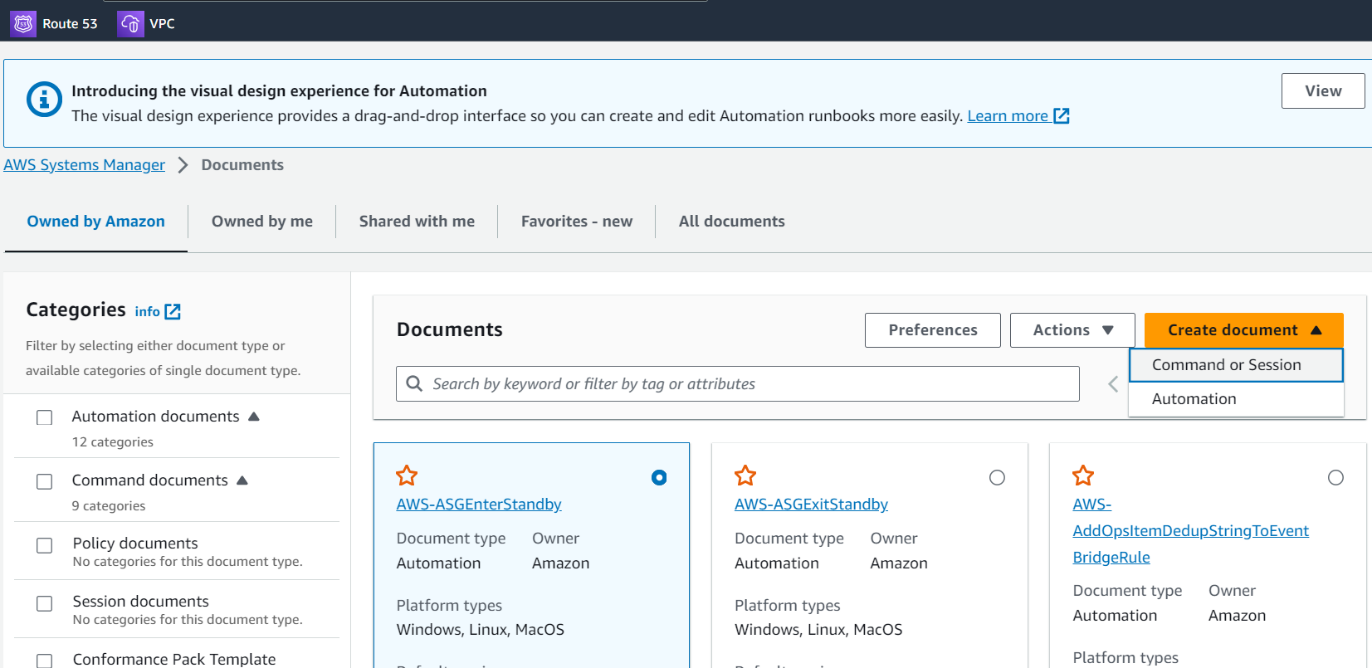
- Click on Create document button and create the document. Here you need to select Command or Session from the dropdown.
- Enter the appropriate Name. It should be unique across all the documents in your AWS environment.
- Choose the Target type as /AWS::EC2::Instance.
- Select the Document type as Command.
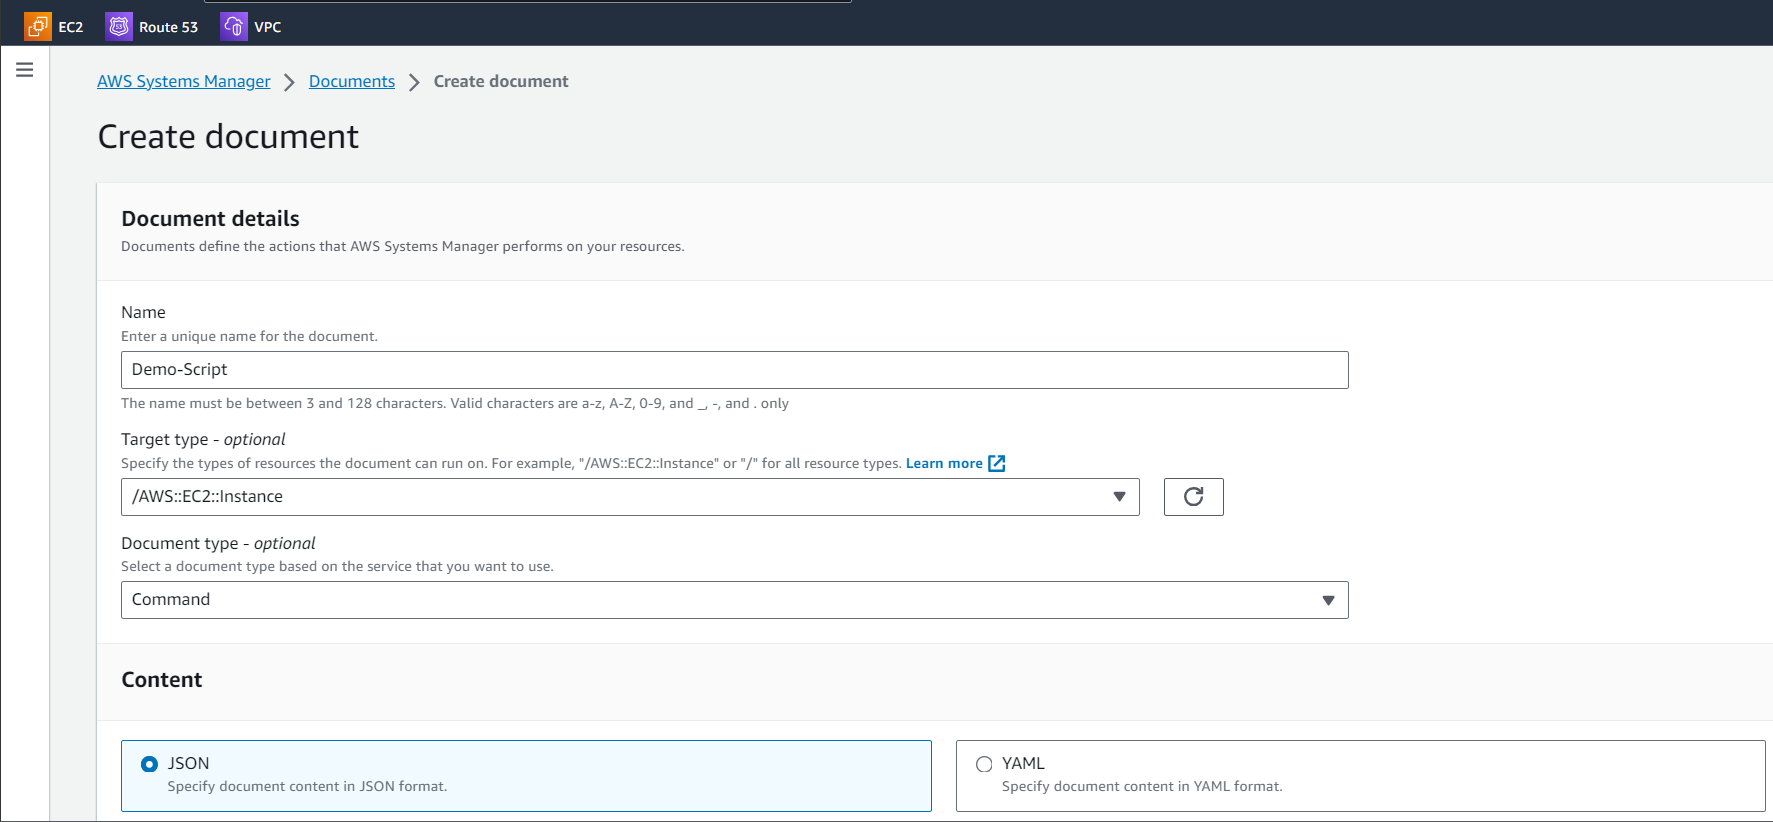
- Here we are selecting content type as JSON. You can put YAML script as well. In that case, select Content as YAML.
- Use one of the following JSON policies according to your requirements of Linux or Windows Installation.
- Paste the below given JSON Policy if you want to do installation for the Windows EC2 Instances
{"schemaVersion": "1.1","description": "New Relic Infra Agent on Windows","parameters": {},"mainSteps": [{"action": "aws:runPowerShellScript","name": "New Relic Infra Agent on Windows","inputs": {"runCommand": ["$command = '[Net.ServicePointManager]::SecurityProtocol = [Net.SecurityProtocolType]::Tls12'","Invoke-Expression $command","Invoke-WebRequest -Uri 'https://awscli.amazonaws.com/AWSCLIV2.msi' -Outfile 'C:\\AWSCLIV2.msi'","Start-Process -Wait msiexec.exe -ArgumentList '/i','C:\\AWSCLIV2.msi','/quiet'","$env:Path = [System.Environment]::GetEnvironmentVariable('Path','Machine')","$env:api=$(aws ssm get-parameter --name '<NEW RELIC PARAMETER STORE KEY NAME>' --query 'Parameter.Value' --output text --with-decryption)","Invoke-WebRequest -Uri 'https://download.newrelic.com/install/newrelic-cli/scripts/install.ps1' -Outfile 'C:\\Windows\\TEMP\\install.ps1'","powerShell.exe -ExecutionPolicy Bypass -File 'C:\\Windows\\TEMP\\install.ps1'; $env:NEW_RELIC_API_KEY=$env:api; $env:NEW_RELIC_ACCOUNT_ID= '<NEW RELIC ACCOUNT ID>'; & 'C:/Program Files/New Relic/New Relic CLI/newrelic.exe' install -y"]}}]} - Paste the below given JSON Policy if you want to do installation for the Linux EC2 Instances
{"schemaVersion": "1.1","description": "New Relic Infra Agent on Linux","parameters": {},"mainSteps": [{"action": "aws:runShellScript","name": " New Relic Infra Agent on Linux","inputs": {"runCommand": ["api=$(aws ssm get-parameter --name '<NEW RELIC PARAMETER STORE KEY NAME>' --query 'Parameter.Value' --output text --with-decryption)","curl -Ls https://download.newrelic.com/install/newrelic-cli/scripts/install.sh | bash && sudo NEW_RELIC_API_KEY=$api NEW_RELIC_ACCOUNT_ID='<NEW RELIC ACCOUNT ID>' /usr/local/bin/newrelic install"]}}]} - Please note that you require to change highlighted details.
- Parameter Store Key Name:
Replace with the name of the Key stored in Parameter store during initial steps. - New Relic Account ID:
Account ID can be found from New Relic Account.
Click on Your Username provided on the bottom of your navigation bar.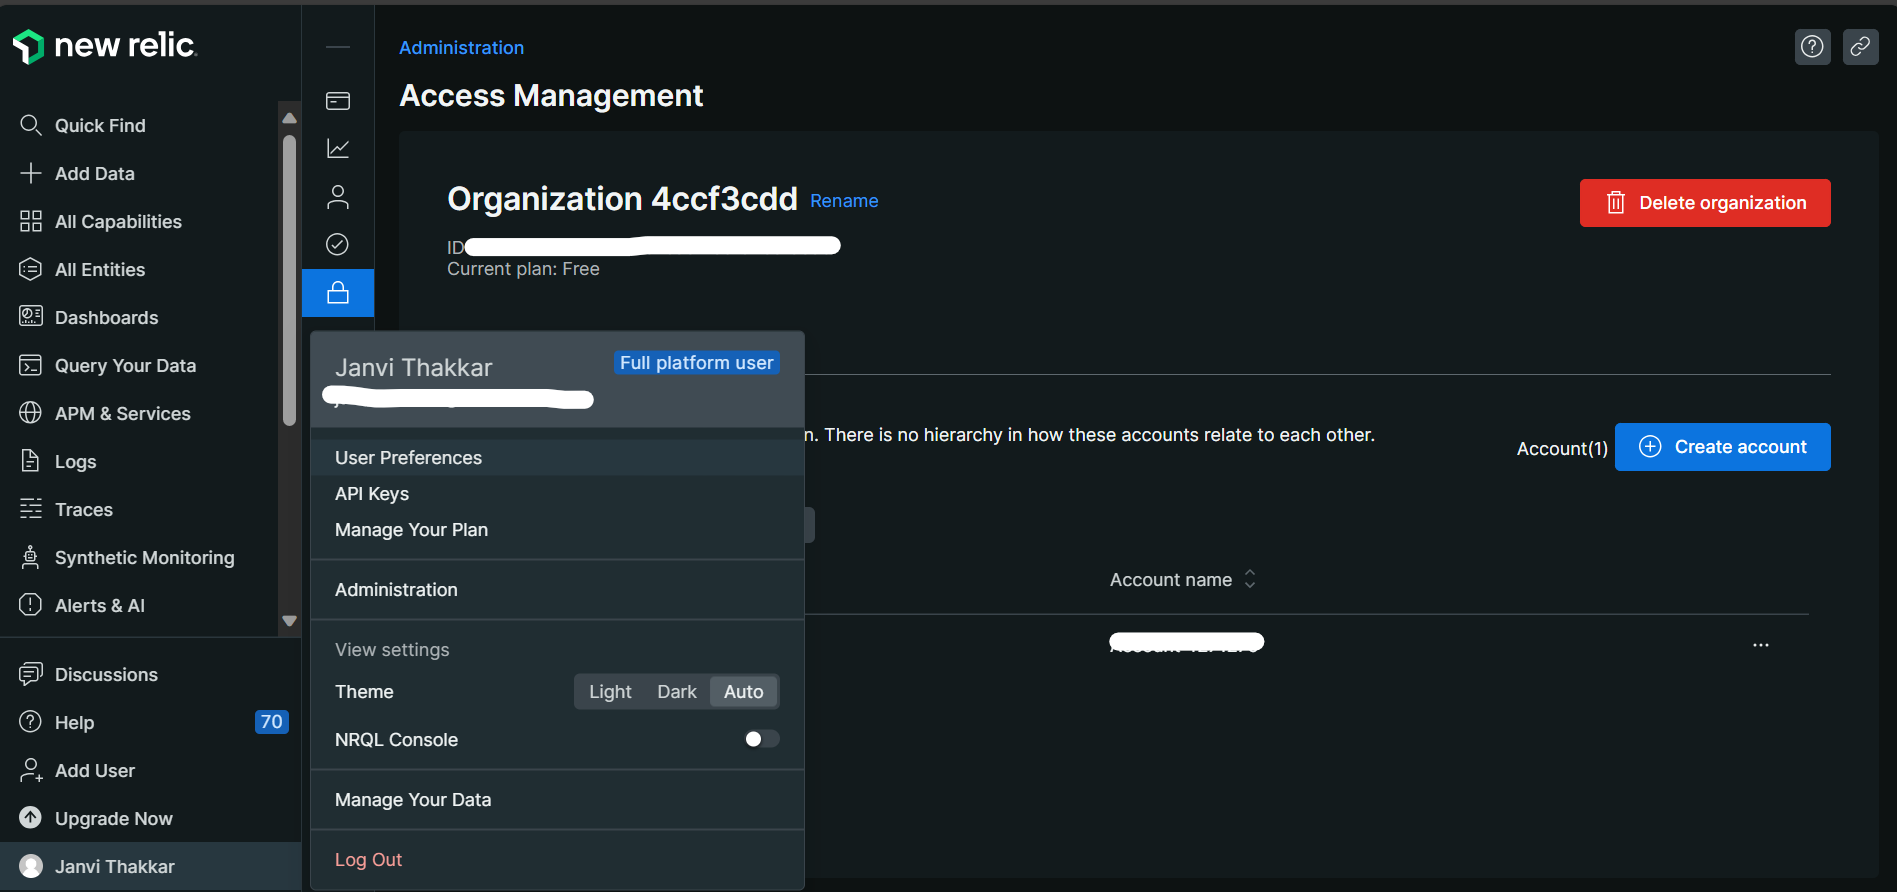
Click on Administration > Access Management > Accounts.
Copy the Account ID and replace it in the place of highlighted field <NEW RELIC ACCOUNT ID>
- Parameter Store Key Name:
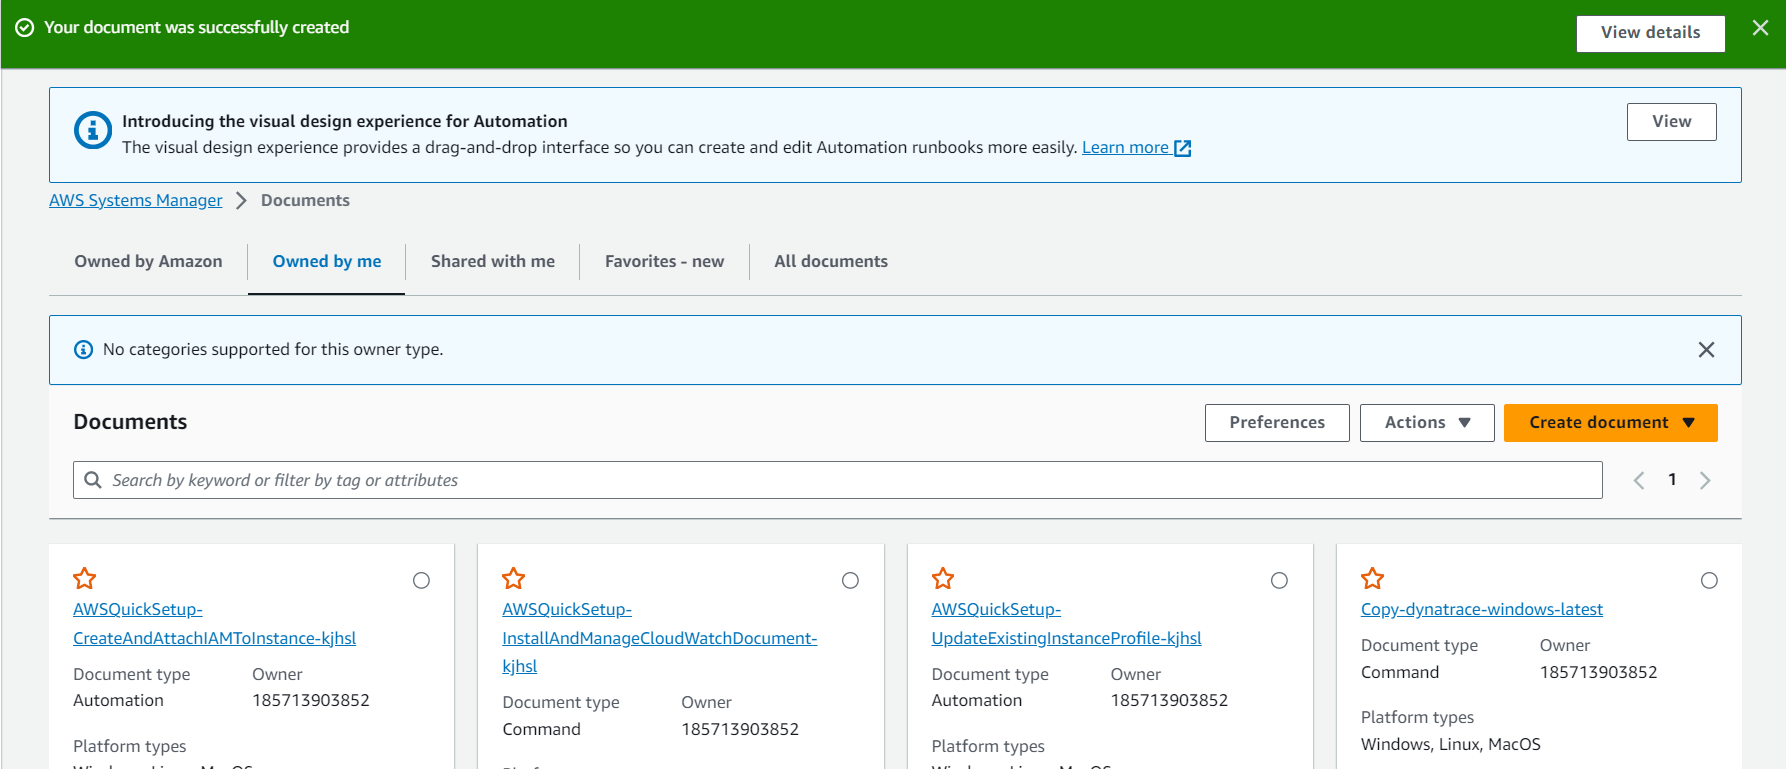
- Once done, click on Create document button.
- Once the document gets created, you will be able to see it in the list of documents. Head over to AWS System Manager > Documents > Owned by me.
- Find and open the document you just created in the previous step.
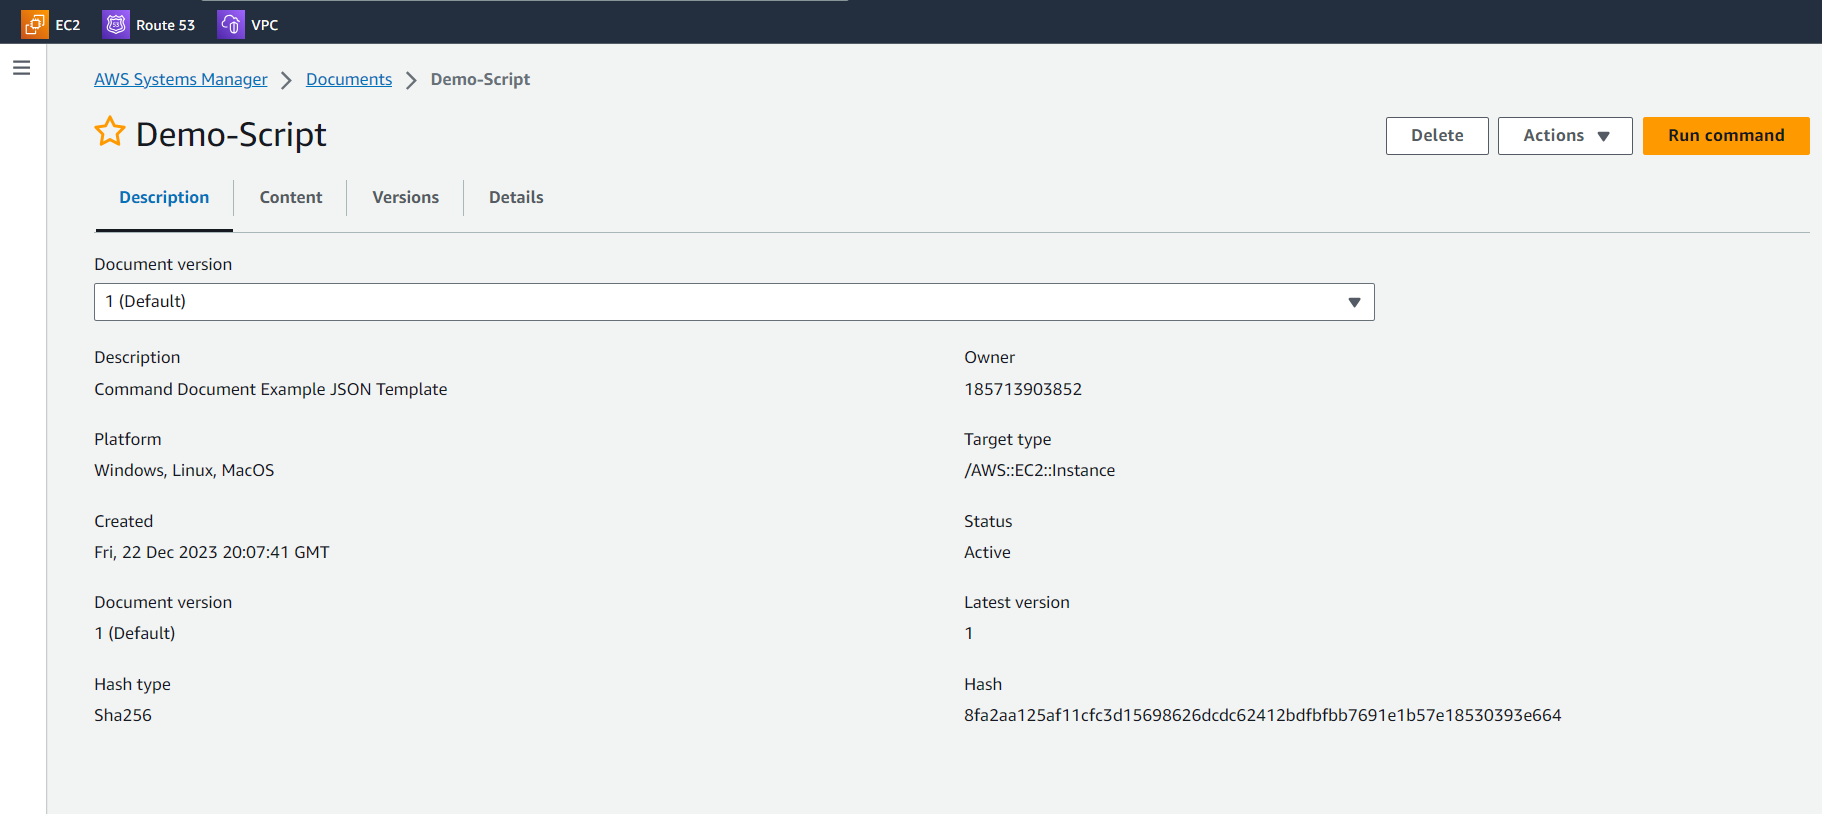
- Click on Run Command button.
- Targets are the EC2 instances to be chosen for running the script. As mentioned in the pre-requisites, all the target instances should be managed nodes in Systems Manager. To choose the target instances, there are 3 options available.
- Specify the instance tags
- Choose instance manually
- Choose a resource group
As we know our target EC2 instances, we will select it manually. You can go with the other 2 options as well based on your requirements.
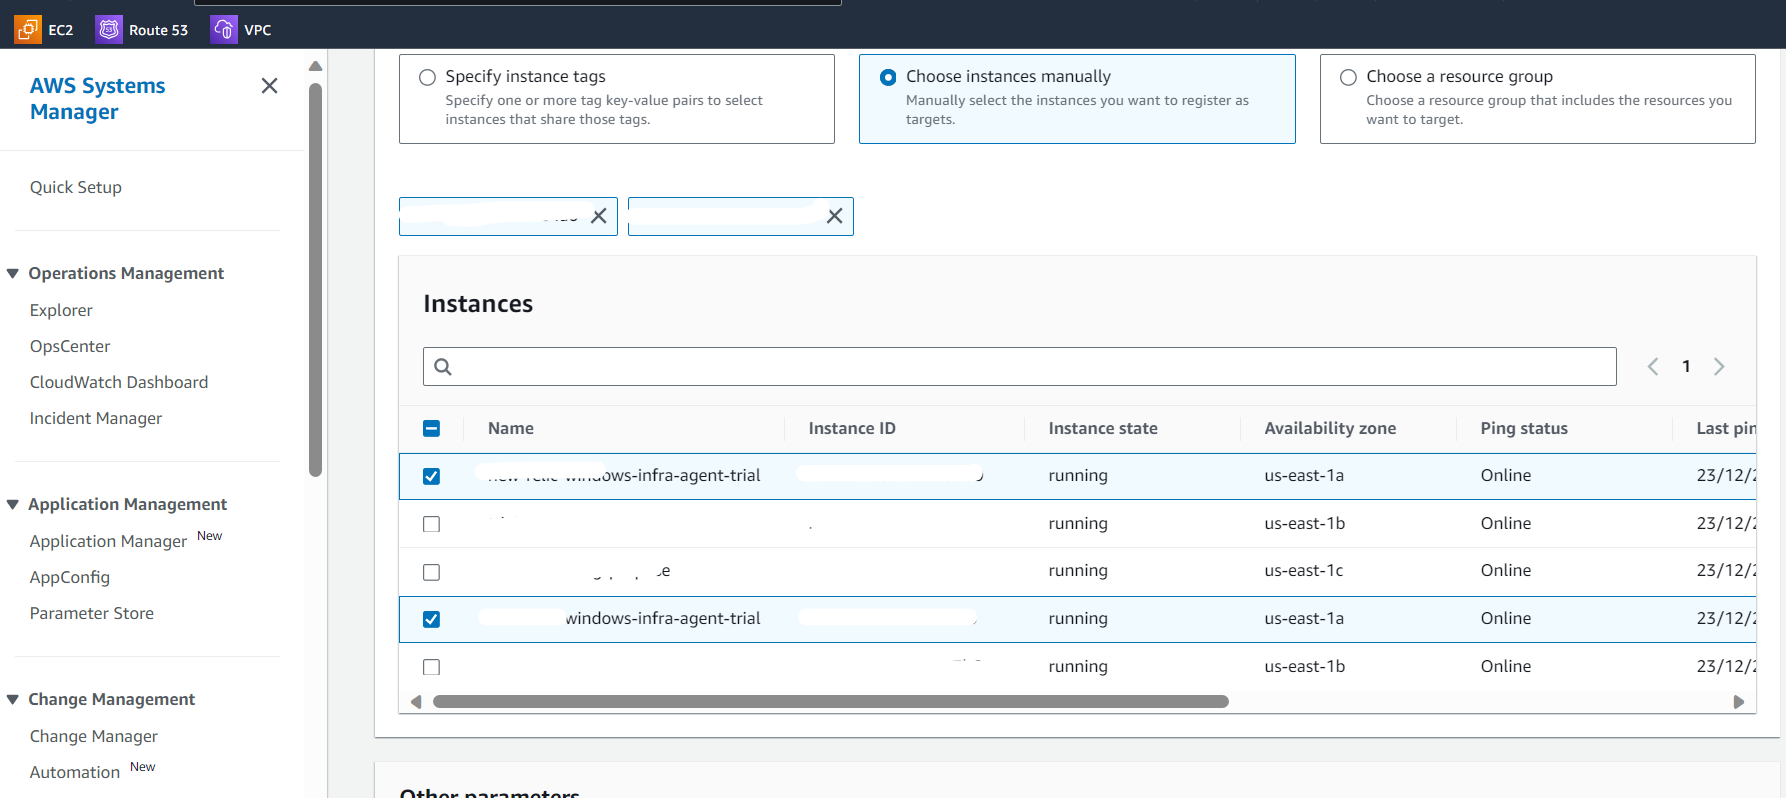
- Leaving everything else as default, click on the Run button. Once it succeeds, you will be able to see the status changed to green.
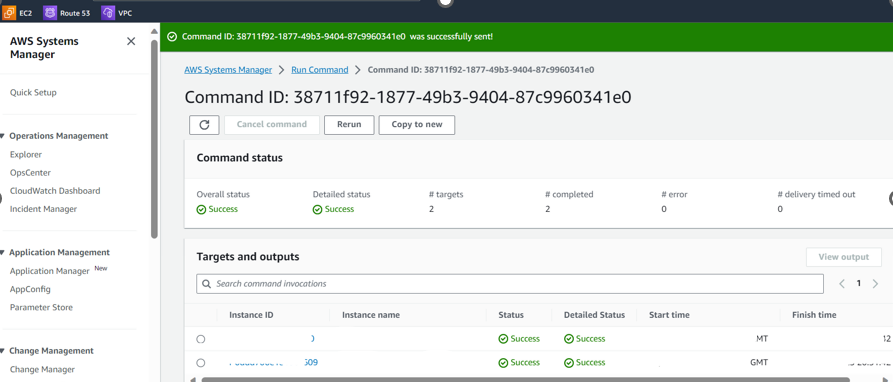
- After successful execution, your instance will have New Relic Infra Agent installed. Switch to New Relic and see the hosts section under Infrastructure tab to verify the result of the installation.
Conclusion:
In conclusion, leveraging the power of AWS Systems Manager provides a seamless and efficient way to install the New Relic Infrastructure agents on EC2 instances simultaneously. With its user-friendly interface and powerful features, System Manager simplifies the execution of tasks across your AWS environment without the need for direct access through SSH or Remote Desktop Protocol.
