How to use AWS Server Migration Service (SMS) to migrate VMs from VMware to AWS
By Intuitive / Jun 28,2018
Overview
In this blog, we will cover how to Migrate virtual machine’s from VMware to AWS using Server Migration Service (SMS).
What is AWS SMS?
AWS Server Migration Service automates the migration of your on-premises VMware servers to AWS Cloud. AWS SMS incrementally replicates your server VMs as cloud-hosted Amazon Machine Images (AMIs) ready for deployment on Amazon EC2. Working with AMIs, you can easily test and update your cloud-based images before deploying them in production.
By using AWS SMS to manage your server migrations, you can:
*Simplify the cloud migration process. You can begin migrating a group of servers with just a few clicks in the AWS Management Console. After the migration has initiated, AWS SMS manages all the complexities of the migration process, including automatically replicating volumes of live servers to AWS and creating new AMIs periodically. You can quickly launch EC2 instances from AMIs in the console.
*Orchestrate multi-server migrations. AWS SMS orchestrates server migrations by allowing you to schedule replications and track progress for a group of servers. You can schedule initial replications, configure replication intervals, and track progress for each server using the console.
*Test server migrations incrementally. With support for incremental replication, AWS SMS allows fast, scalable testing of migrated servers. Because AWS SMS replicates incremental changes to your on-premises servers and transfers only the delta to the cloud, you can test small changes iteratively and save on network bandwidth.
*Support the most widely used operating systems. AWS SMS supports the replication of operating system images containing Windows, as well as several major Linux distributions.
*Minimize downtime. Incremental AWS SMS replication minimizes the business impact associated with application downtime during the final cutover.
Pricing
There is no additional fee to use Server Migration Service. You pay the standard fees for the S3 buckets, EBS volumes, and data transfer used during the migration process, and for the EC2 instances that you run.
Ref: docs.aws.amazon.com/server-migration-service/latest/userguide/server-migration.html
Infrastructure Components
* IAM (Users, Policys and Roles )
* VMware (SMS connector vCenter Role and vCcenter User)
* Server Migration Service (SMS)
Steps to Migrate VM as below
Step1: Create a new user with SMS role and SMS connector policies in IAM.

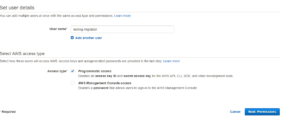

Review your settings and be sure to note down your access key ID and secret access key.
Step2: Create an IAM role with SMS role policy.
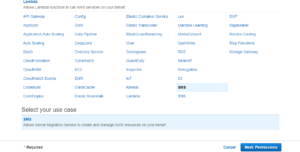
Attach the Server Migration Service role policy to this role.

Give the role a name of Testing-migration-role.

Step3: Create a new role (AWS SMS connector) in vCenter with the following privileges.
- DataStore > browse datastore and low-level File Operations
- Vapp > export (Vapp.ifo)
- Virtual Machine > snapshot management> create snapshot and remove snapshot
- Host > config > system management

Step4: Create a vCenter user that SMS connector can use as a service account to log in to vCenter.

Deploy the SMS connector
Step 5: Launch SMS on AWS console and click on connectors then and choose SMS to connect setup guide.
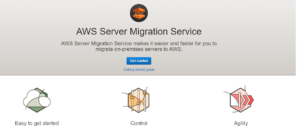
Step 6: Download SMS connector for the vCenter environment by click on download OVA.
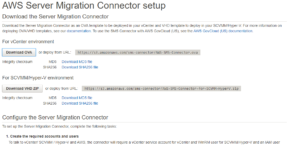
Step 7: Launch the VM by deploy OVA templet in vCenter with default settings.

Step 8: Launch the AWS SMS connect (VM) with IP address in the browser.
https:// IP address

copy the IP Address and paste it https://(IP address)
Once your OVA has been deployed in VMware vCenter, you’ll want to open a web browser and navigate to the IP address of the AWS SMS Connector VM that was deployed with the OVA. You’ll see a page like this one where you can click the Get started now button.

Step 9: Accept the license agreement.

Step 10: After you read through the license agreement you’ll need to set a password for the management console.
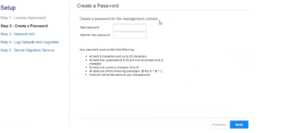
Setp 11: After the password is set, configure network info.
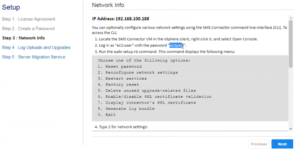
If you want to set a static IP you’ll need to open the VMware console for the machine to get a screen like the one below. You won’t be able to SSH into the machine so the VMware console is critical for this step.

Step 12: Back to the connector web page. Select whether or not to upload logs and to auto-upgrade the appliance. These are totally up to you.

Step 13: Select the AWS region and assign AWS credential (Access key and Secret Key).
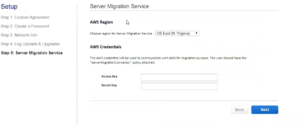
Step 14: Assign the vCenter server account details.
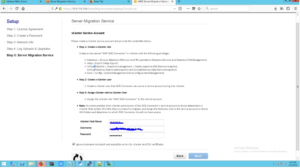
Step 15: Now that we’ve got that silly setup stuff out of the way, we can log in to the AWS portal and go to the Server Migration Service again. Look under the connectors tab which should show a healthy connector communicating with the AWS SMS service.
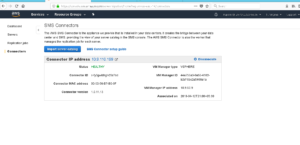
Click on Import server catalog to retrieve the list of virtual machines available for replication.

Step 16: Here we can see all the server that is in vCenter.
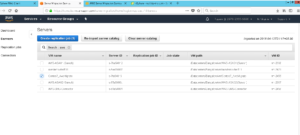
Step 17: Select the server that you’re going to migrate to the cloud.

Step 18: Once you’ve selected the server to replicate, the second step is to determine the license type. I’m providing my own so I selected the BYOL type and then clicked next.

Step 19: Configure replication job settings.

Review the above settings and get started.

Step 20: Click on view Replication Job to find out the job State.
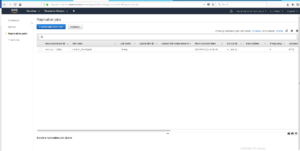
Now your server has been successfully migrated to Amazon Web Services.
Thanks.


